Build a Layered Iced Hibiscus and Mango Drink Using Two Separate Pours
A two-tone hibiscus and mango drink depends on density difference, not luck. Hibiscus concentrate made with sugar sits denser than thinned mango puree, so pouring hibiscus first over ice and adding the mango layer slowly on top creates a visible colour boundary. The technique requires chilled components, the right dilution ratio for the mango, and a controlled second pour. This guide explains each variable so the layers hold long enough to serve and photograph.
Read the note ↓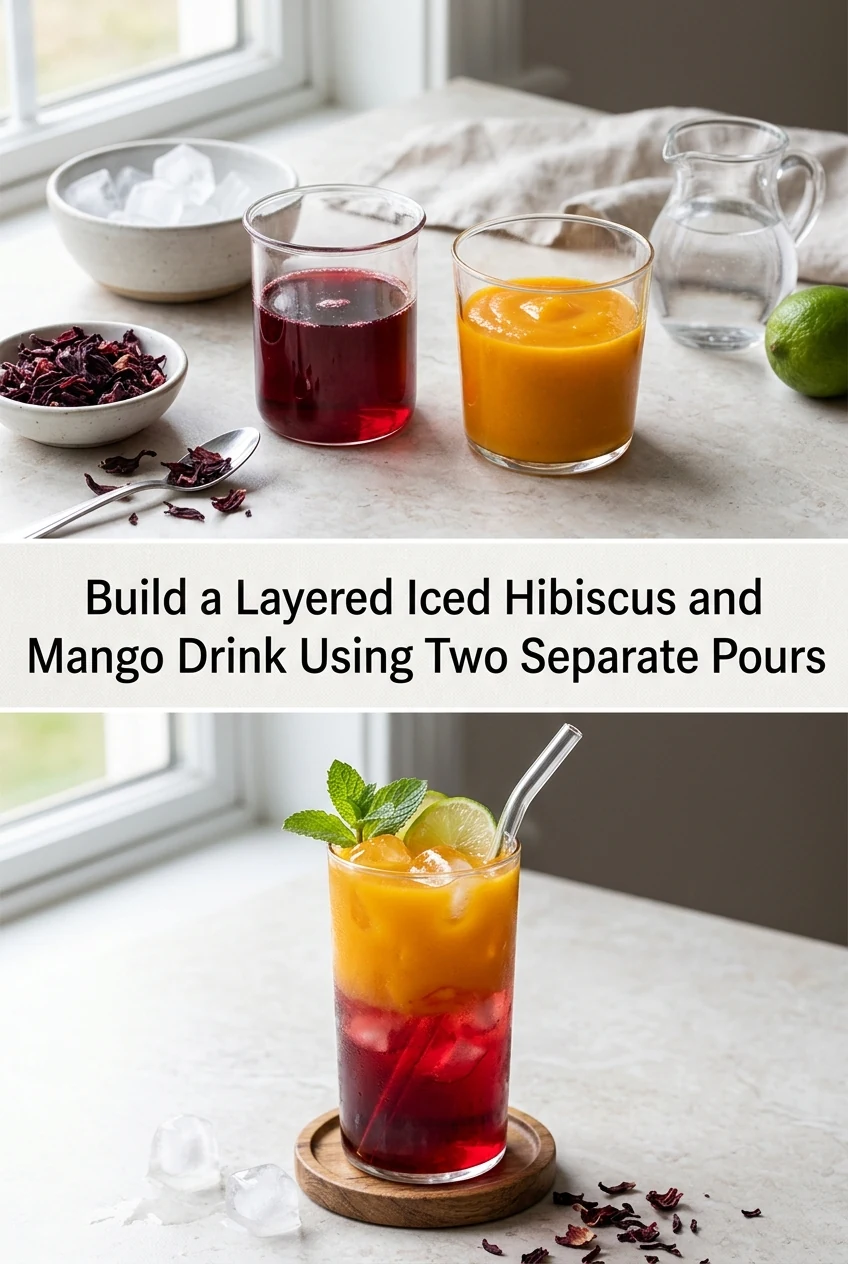
AI-generated editorial concept created for this article. The image is not a technical diagram or a tested result.
Brew and Sweeten the Hibiscus Concentrate in Advance
Steep 2 tablespoons of dried hibiscus flowers in 150 millilitres of just-boiled water for 8 minutes. Strain out the flowers and stir in 2 tablespoons of white sugar while the liquid is still warm. Stir until fully dissolved, then refrigerate until completely cold before use. The sugar increases the density of the hibiscus layer, which is what allows the mango to float above it. A warm or unsweetened hibiscus base will not hold a visible layer boundary reliably.
Thin the Mango Puree to the Correct Consistency
Combine 3 tablespoons of plain mango puree with 4 tablespoons of cold water and stir until smooth. The thinned mixture should pour in a slow, steady stream rather than falling in thick drops. If it is too thick, the pour pressure will disturb the hibiscus layer below. If it is too thin, the density difference disappears and the layers merge immediately. This ratio is an illustrative starting point; adjust by half a tablespoon of water at a time and test the pour speed before assembling.
Fill the Glass With Ice and Add the Hibiscus First
Use a tall, straight-sided glass of at least 350 millilitre capacity. Fill it with ice cubes to about two-thirds full. Pour the cold hibiscus concentrate directly over the ice in one pour. The ice slows the liquid and distributes it evenly. Allow the hibiscus to settle for 10 seconds before proceeding. Pouring the second layer too quickly after the first does not give the hibiscus time to chill fully against the ice, which slightly reduces its density advantage.
Execute the Slow Second Pour for the Mango Layer
Hold a spoon face-down just above the surface of the hibiscus layer, with the tip of the spoon touching the inside of the glass. Pour the thinned mango mixture slowly over the back of the spoon so it spreads gently across the surface rather than dropping through the hibiscus below. Move the spoon upward gradually as the mango layer rises. This technique disperses the kinetic energy of the pour and is the single most important factor in achieving a clean visible boundary.
Serve Immediately and Note Layer Stability
The visible layer boundary is most distinct in the first 2 to 3 minutes after assembly. As the ice melts and the liquids reach the same temperature, the density difference decreases and the layers will gradually blend. This is expected and does not indicate an error in preparation. Serve the drink as soon as it is assembled. Use pasteurized mango puree and refrigerate any unused puree promptly at 4 degrees Celsius or below, consuming it within the timeframe stated on the product packaging.
A little more
to know.
Does the type of ice affect how well the layers hold?
Larger, slower-melting ice cubes are preferable to crushed ice. Crushed ice melts faster, dilutes the hibiscus layer quickly, and reduces its density advantage before the mango layer is even added, making a clean boundary harder to achieve.
Can I prepare the hibiscus concentrate the night before?
Yes. Store the strained, sweetened hibiscus concentrate in a sealed container in the refrigerator at 4 degrees Celsius or below. Using it cold the next day is actually advantageous because it will be thoroughly chilled, which helps maintain the density difference during assembly.
Original editorial guidance and recipe formulations, not independently kitchen-tested. Times are estimates and depend on equipment and product directions. Cooked bases need additional cooling and refrigeration before cold serving. Images are AI-generated illustrations; appearance and yield may vary. Check actual ingredient labels, allergens, and any certification you require. We do not certify products. Read our approach.
Save to Pinterest ↗ANOTHER IDEA FOR THE COUNTER