Portion and Freeze Mango Cubes in a Single Layer for a Week of Blended Drinks
Mango cubes dumped into a bag and frozen together form a solid block that jams a blender and blends unevenly. Spreading them flat on a tray first lets each cube freeze independently, so you can lift out exactly one drink portion without chipping or waiting. This guide covers cutting, spacing, freezing time, transferring, and portioning so your prep work at the start of the week pays off every morning.
Read the note ↓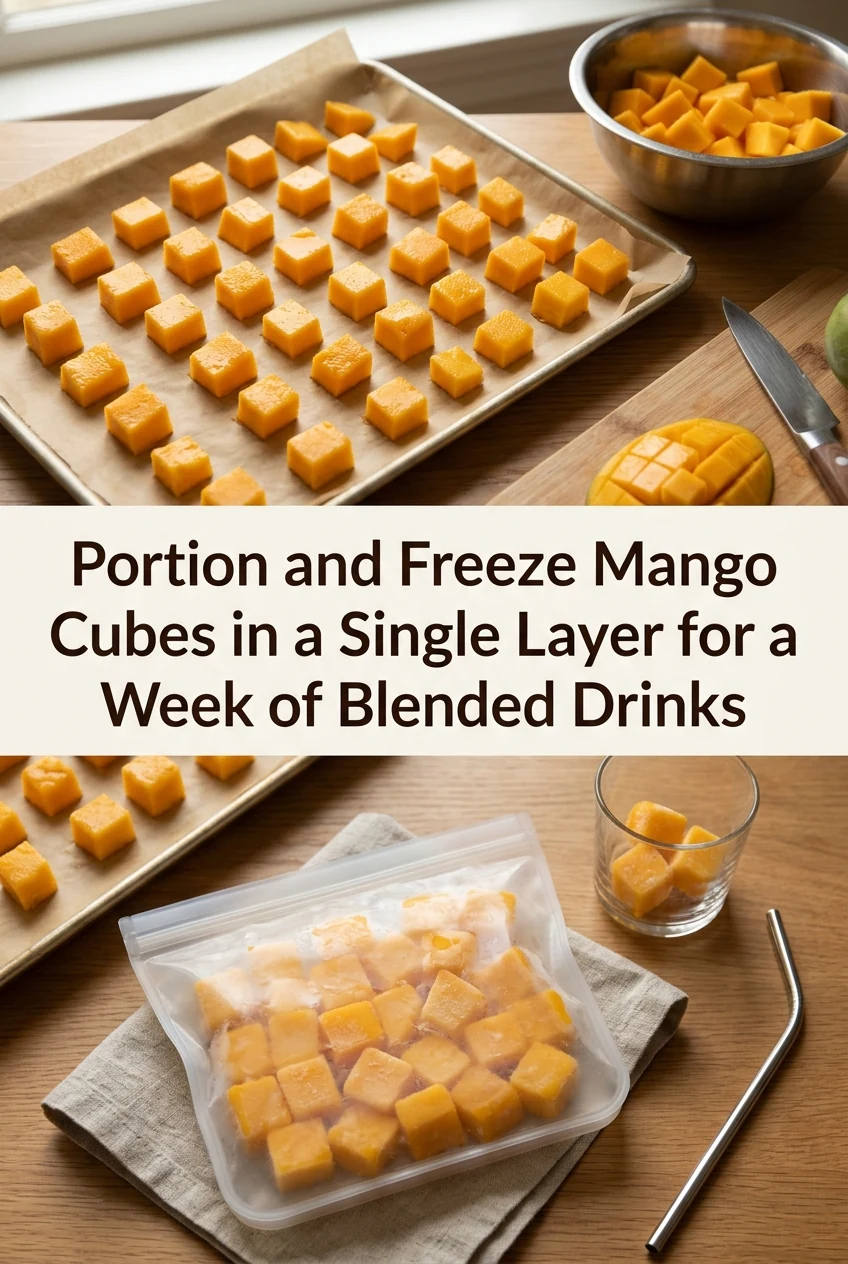
AI-generated editorial concept created for this article. The image is not a technical diagram or a tested result.
Choose and Cut the Mango
Select firm-ripe mangoes with no bruised patches. Peel, then slice the flesh away from the stone in broad pieces. Cut each piece into cubes roughly 2 cm on each side. Smaller pieces freeze faster but can clump more easily around bag seams; larger pieces take longer to freeze solid. Aim for uniform size so every cube in a single drink portion thaws and blends at the same rate. Pat cubes dry with a clean paper towel to reduce surface moisture before spreading.
Spread Cubes in a Single Layer on the Tray
Line a flat baking tray or rimmed sheet pan with parchment or a silicone mat. Arrange cubes so no two are touching. A standard 30 by 40 cm tray holds roughly 80 to 100 cubes at 2 cm spacing, which is enough for five to six single-drink portions of about 120 to 150 g each. If you have more cubes than tray space, use a second tray rather than crowding. Crowded cubes touch at the edges and fuse during freezing even if they look separated before going in.
Freeze Until Fully Solid
Place the tray level in the coldest part of your freezer, typically the back shelf away from the door. Leave it undisturbed for at least three hours; four hours is more reliable for 2 cm cubes. To check readiness, press one cube with a fingertip. It should feel completely rigid with no give at the center. If the center still yields slightly, return the tray for another hour. Partially frozen cubes will stick together in the bag and defeat the purpose of the single-layer step.
Transfer and Portion Into the Bag
Once solid, work quickly so the cubes do not begin to thaw and stick. Slide the parchment to lift cubes off the tray and funnel them into a freezer-safe zip bag. Before sealing, divide the cubes into rough portions inside the bag by pressing a gentle crease between groups. As an illustrative example, if you have 90 cubes and want six portions, each crease section holds about 15 cubes, approximately 125 g. Squeeze out excess air, seal, and label with the date.
Use Within a Practical Timeframe
Frozen mango cubes stored in an airtight freezer bag maintain high quality throughout the week and keep well for several months at standard freezer temperatures of -18°C (0°F) or colder. Pressing out excess air minimizes the risk of freezer burn and frost accumulation over extended storage. When ready to blend, remove one pre-portioned section, add your liquid base, and blend immediately. Do not refreeze cubes that have begun to thaw, as thawing and refreezing damages the fruit's cell structure and produces a watery texture.
A little more
to know.
Can I use frozen mango bought from a store instead of fresh?
Store-bought frozen mango is typically individually quick-frozen, so you can skip the tray step. Check the bag before buying to make sure the pieces move freely; if the cubes have fused into a solid block, break them apart gently inside the bag rather than thawing and refreezing, which ruins the fruit's texture.
Does the type of bag affect how well the cubes stay separate?
Thicker freezer-grade bags resist moisture transfer better than thin sandwich bags, which can allow frost to build up between cubes and cause them to stick. Press out as much air as possible regardless of bag type before sealing.
Original editorial guidance and recipe formulations, not independently kitchen-tested. Times are estimates and depend on equipment and product directions. Cooked bases need additional cooling and refrigeration before cold serving. Images are AI-generated illustrations; appearance and yield may vary. Check actual ingredient labels, allergens, and any certification you require. We do not certify products. Read our approach.
Save to Pinterest ↗ANOTHER IDEA FOR THE COUNTER