Make a Plain Baked Oat Breakfast Cup in Two Ramekins
A baked oat breakfast cup is a spoonable, softly set dish baked directly in a ramekin. It is not a cookie, not granola, and not a blended oat drink. Instead, rolled oats are combined with liquid and a few pantry staples, then baked until the mixture holds a gentle, scoopable shape inside its ceramic vessel. This article walks through one illustrative home-cafe plan for making two servings in standard ramekins. Because every oven behaves differently and individual ingredients vary, treat the steps below as a working guide rather than a laboratory-tested result. Adjust time and liquid to suit your own equipment and taste.
Read the note ↓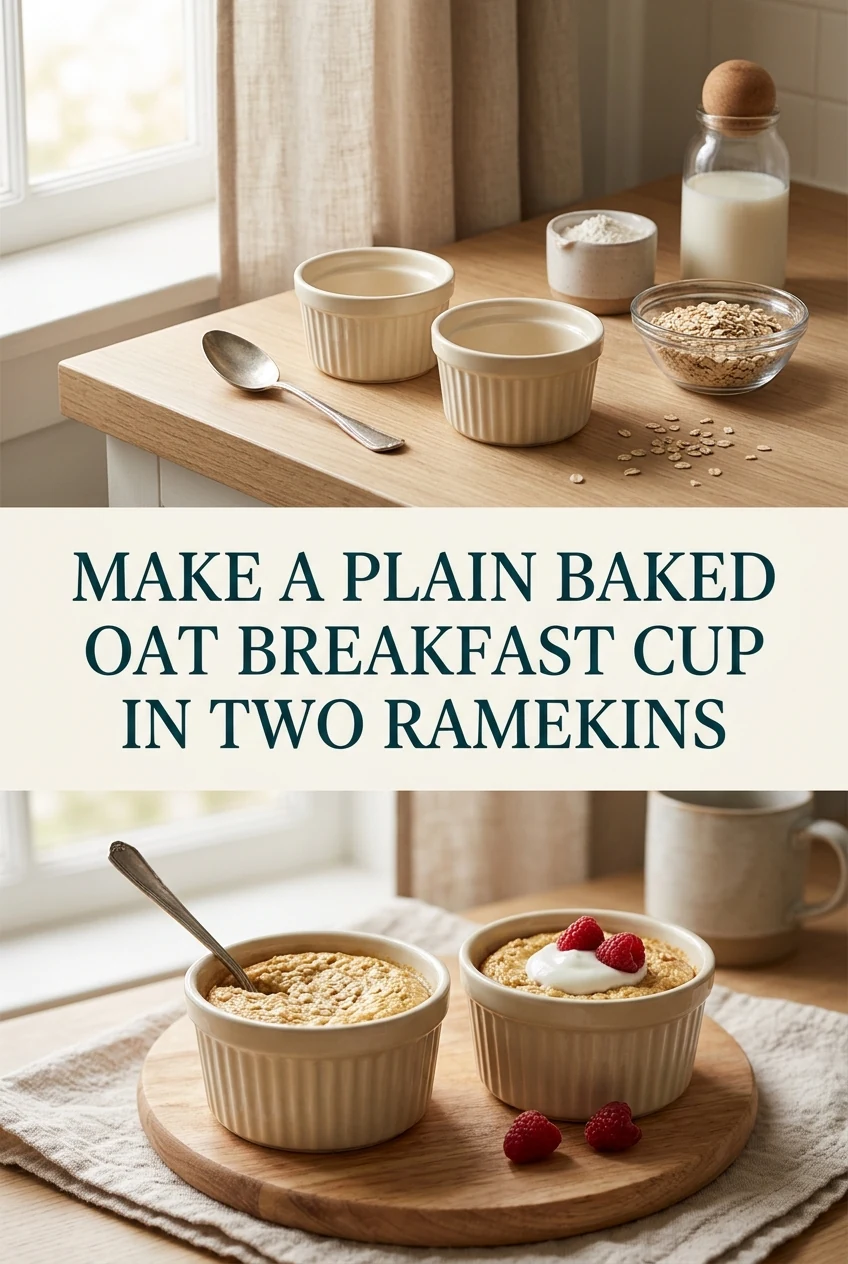
AI-generated editorial concept created for this article. The image is not a technical diagram or a tested result.
Understand the Dish and the Vessel
A ramekin is a straight-sided ceramic baking dish typically sold in capacities between 150 ml and 240 ml. For this plan, two ramekins of approximately 200 ml each are used. The finished baked oat cup should fill each ramekin to within about one centimetre of the rim after baking, leaving a small border so the mixture does not bubble over. The dish is spoonable when warm, meaning a spoon pressed into the centre meets soft resistance rather than a crisp crust all the way through. This texture comes from the ratio of oats to liquid and from the baking time, both of which you will need to observe and adjust in your own kitchen.
Gather Halal Ingredients
For two ramekins you will need: 80 g rolled oats, 240 ml whole milk or an unflavoured plant-based milk of your choice, one medium egg, one tablespoon of honey or maple syrup, a small pinch of fine salt, and a quarter teaspoon of alcohol-free vanilla flavoring. Check the label of any vanilla product you purchase and confirm it is explicitly alcohol-free before use. If you wish to add a topping, a few banana slices or a light dusting of ground cinnamon placed on top before baking works well. All ingredients should be halal-suitable; if you use any product containing gelatin, confirm it is labeled halal.
Mix and Fill the Ramekins
Lightly grease the inside of each ramekin with a neutral oil or a small amount of butter, coating the base and sides so the baked oat cup releases cleanly onto a spoon. In a bowl, whisk the egg with the milk, honey or maple syrup, salt, and alcohol-free vanilla flavoring until combined. Stir in the rolled oats and let the mixture rest for five minutes so the oats begin to absorb the liquid. After resting, stir once more and divide the mixture evenly between the two prepared ramekins. Each ramekin should be roughly three-quarters full at this point. In this illustrative plan, 80 g of oats combined with 240 ml of liquid divides into approximately 160 ml per ramekin, which sits comfortably within a 200 ml vessel with room to expand slightly.
Bake and Check for Doneness
Place the filled ramekins on a small baking tray and set them in an oven that has been preheated according to your oven's own controls. A commonly used starting point for baked oat dishes in home ovens is around 180 degrees Celsius, but your oven may run hotter or cooler than its dial suggests. Begin checking at the 20-minute mark. The surface should appear set and lightly golden at the edges, and the centre should not slosh when you gently move the tray. If the centre still appears very liquid, continue baking in five-minute increments and check again. Remove the ramekins from the oven using oven gloves and set them on a heatproof surface. The cups will firm up slightly as they cool for a few minutes.
Serve and Store Safely
Serve the baked oat cups warm, directly in the ramekins, with a spoon. Because the mixture contains egg and milk, any portion not eaten immediately should be covered and refrigerated promptly. Do not leave the cups at room temperature for an extended period. When you want to eat a refrigerated cup, reheat it in the oven or a microwave following your appliance's own instructions until it is heated through. Do not invent a specific safe storage window; instead, follow general food-safety guidance for cooked egg and dairy dishes in your region. This plan is a home-cafe technique and not a commercially tested product, so your own observation of the dish's condition after refrigeration is the appropriate guide.
A little more
to know.
Can I use quick oats instead of rolled oats?
Quick oats absorb liquid faster and produce a softer, more uniform texture than rolled oats. If you substitute quick oats in this plan, the mixture may set more quickly during baking, so begin checking for doneness a few minutes earlier than you would with rolled oats. The finished cup will be slightly less chewy. Steel-cut oats are not recommended here because they require significantly more liquid and a longer cooking time than this plan accounts for.
What if my ramekins are a different size?
Ramekin capacity varies between brands. If your ramekins are smaller than 200 ml, reduce the total mixture slightly so each vessel is no more than three-quarters full before baking. If your ramekins are larger, the same total mixture will fill them less deeply and may bake more quickly, so check for doneness earlier. The arithmetic in this plan is illustrative for a 200 ml vessel; adjust proportionally to match your actual dishes.
Original editorial guidance and recipe formulations, not independently kitchen-tested. Times are estimates and depend on equipment and product directions. Cooked bases need additional cooling and refrigeration before cold serving. Images are AI-generated illustrations; appearance and yield may vary. Check actual ingredient labels, allergens, and any certification you require. We do not certify products. Read our approach.
Save to Pinterest ↗ANOTHER IDEA FOR THE COUNTER