Arrange Blender Jar, Strainer and Storage Jug in a Line Before Blending Fruit
Blending fruit produces a batch that needs to move quickly from jar to strainer to storage before it separates or, in the case of a warm blend, before it cools unevenly. Reaching across a cluttered counter while holding a full blender jar is one of the most common causes of spills in a small kitchen. Arranging your equipment in a straight line before you start minimizes awkward reaching and keeps the workflow predictable whether you are handling a cold smoothie base or a warm fruit puree.
Read the note ↓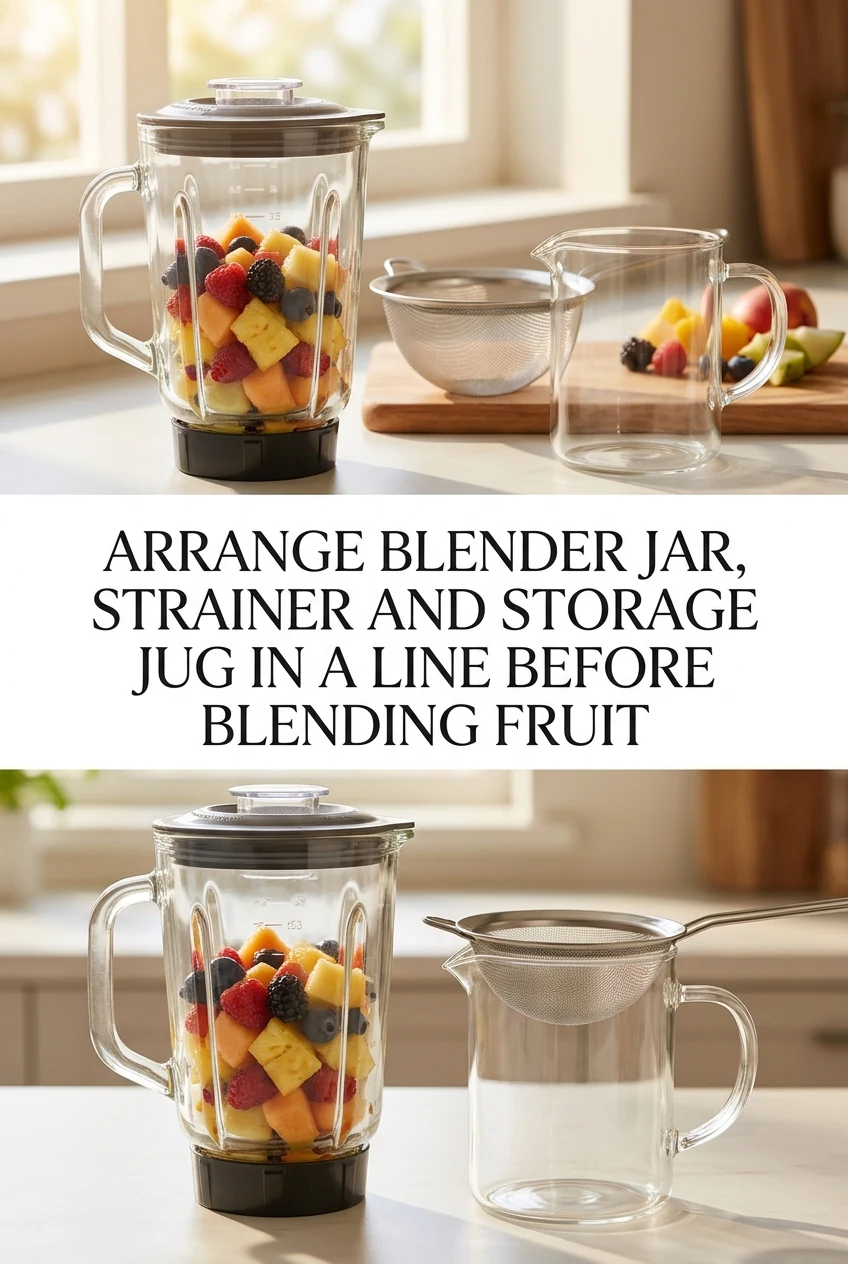
AI-generated editorial concept created for this article. The image is not a technical diagram or a tested result.
Map Your Counter Space Before Placing Equipment
Stand at your counter and identify a clear run of at least 60 cm in a straight line. Place the blender base at the far left if you are right-handed, or far right if left-handed, so your dominant hand controls the pour. Place the receiving jug at the opposite end of the line with the strainer resting securely across its rim before blending begins. Confirm the strainer seats stably on the jug opening without rocking. A strainer that shifts during pouring is as disruptive as a cluttered counter.
Choose a Strainer That Fits the Jug Opening
A fine-mesh strainer with a diameter slightly wider than the jug opening sits stably without being held. If your strainer is too small, it drops into the jug; if too large, it rocks. For a standard 1-litre storage jug with an opening of roughly 8 to 10 cm, a strainer with a 12 cm diameter typically rests securely. This is an illustrative example based on common kitchen sizes, not a specification. Measure your own jug opening and strainer before setting up.
Remove the Blender Jar Before Moving It
After blending, switch off the motor completely and wait for the blade to stop before unlocking the jar from the base. Carry the jar with both hands, one on the handle and one supporting the base, directly to the strainer position. Do not tilt the jar until it is centred over the strainer. For hot fruit blends, use a folded dry cloth on the supporting hand. Never carry a full blender jar with one hand across a cluttered path between stations.
Pour in a Controlled Tilt, Not a Sudden Dump
Begin tilting the blender jar slowly so the blended fruit flows in a steady stream rather than surging out all at once. A sudden pour overwhelms the strainer capacity and pushes liquid over the rim of the jug. If the strainer begins to fill faster than it drains, pause the pour and let the liquid level drop before continuing. For thicker fruit blends, use a silicone spatula to press gently against the pulp in the strainer to help liquid pass through without forcing seeds or fibre into the jug.
Transfer to Refrigeration Within the Safe Window
Once strained, cover the jug and move it to the refrigerator promptly. Blended fruit is a perishable mixture and should be placed into refrigeration at 4 degrees Celsius or below within two hours of preparation, or within one hour if your kitchen is above 32 degrees Celsius. Do not leave the jug on the counter while you clean the blender and strainer. Refrigerate first, then return to clean up. Label the jug with the preparation time so you know when the batch was made.
A little more
to know.
What if my counter is too short for a straight three-station line?
Use an L-shaped arrangement with the blender at the corner. The key is that each station is within one step and no reach crosses another piece of equipment. Avoid placing the jug behind the blender base where it is hidden from view.
Should I rinse the strainer between batches of different fruits?
Yes, rinse and shake it dry between batches to prevent flavour carry-over and to clear pulp that would slow drainage on the next pour. A clogged strainer from the first batch significantly slows the second pour.
Original editorial guidance and recipe formulations, not independently kitchen-tested. Times are estimates and depend on equipment and product directions. Cooked bases need additional cooling and refrigeration before cold serving. Images are AI-generated illustrations; appearance and yield may vary. Check actual ingredient labels, allergens, and any certification you require. We do not certify products. Read our approach.
Save to Pinterest ↗ANOTHER IDEA FOR THE COUNTER