Arrange a Small Iced Coffee Bar on a Single Tray for Two People
Setting up a self-serve iced coffee station for two people on a single tray requires deliberate placement so neither person reaches across the other, nothing tips and the sequence of assembly flows naturally from left to right or right to left depending on your preference. This guide covers tray size, item placement order, how to keep the ice bucket stable, where to position the syrup bottle and how to brief your guest so the experience is smooth rather than awkward.
Read the note ↓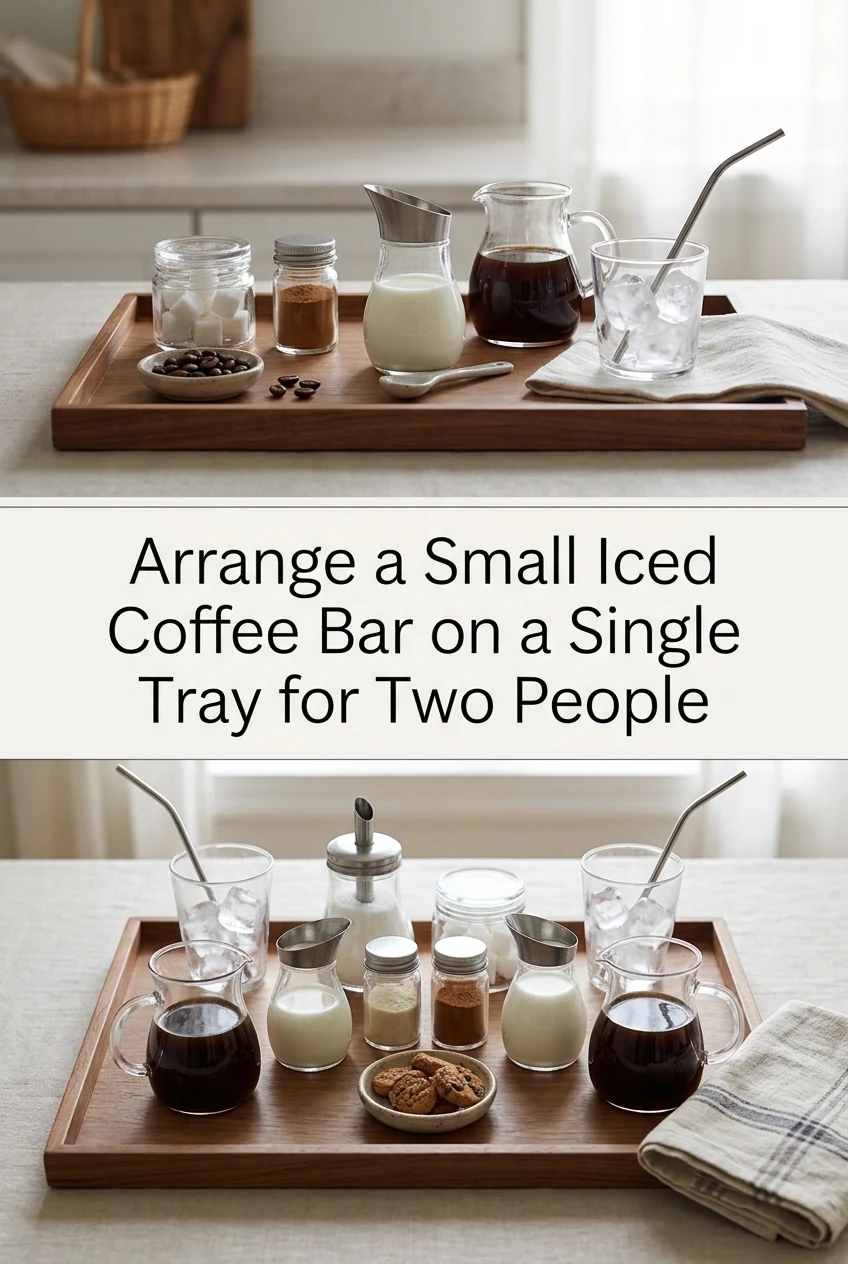
AI-generated editorial concept created for this article. The image is not a technical diagram or a tested result.
Choose a Tray That Fits the Components Without Crowding
A rectangular tray measuring approximately 45 cm by 30 cm accommodates two tall glasses, a small ice bucket, a 500 ml jug of brewed coffee, a 250 ml milk jug and one syrup bottle without items touching. If your tray is smaller, remove the syrup bottle from the tray and place it directly on the table beside the tray instead. Crowding items together increases the chance of spills when guests reach across. A non-slip tray liner cut to fit the tray base keeps everything from sliding during carrying.
Position the Ice Bucket and Glasses First
Place the ice bucket at the back centre of the tray because it is the tallest and heaviest item and anchors the arrangement. Set one tall glass on the left side of the bucket and one on the right, each with a long spoon resting inside. Positioning the glasses flanking the ice bucket means each person has a natural reach to their own glass and to the ice without crossing over the other person's space. Fill the ice bucket just before carrying the tray to the table.
Place the Coffee Jug and Milk Jug at the Front
Set the brewed coffee jug at the front left of the tray and the milk jug at the front right. This front placement keeps both jugs within easy reach without requiring anyone to lean over the glasses or ice bucket. Both jugs should be filled before the tray is assembled. The coffee jug should contain room-temperature or chilled brewed coffee rather than hot coffee, since hot coffee poured directly over ice in a glass will melt it rapidly and dilute the drink significantly.
Add the Syrup Bottle in the Remaining Corner
Place the syrup bottle in the back corner of the tray opposite your dominant hand, with the cap already loosened so guests do not struggle with it. If two different syrups are available, place them side by side in the back corners, but label each one with a small folded card so guests do not have to guess. A 250 ml syrup bottle fits comfortably in a tray corner without overhanging the edge. Check that the cap is secure enough not to drip but loose enough to open with one hand.
Brief Your Guest Before They Begin
A brief one-sentence instruction prevents hesitation. Tell your guest the intended order: ice first, then coffee, then milk, then syrup. This sequence matters because adding syrup before ice can cause it to pool at the bottom of the glass and not distribute evenly. You do not need to demonstrate the full pour, but pointing out which jug is which saves the guest from tasting the milk jug expecting coffee. Keep a small folded cloth napkin on the tray corner for any drips.
A little more
to know.
How much brewed coffee should I put in the jug for two people?
A practical starting amount is 400 ml to 500 ml. When glasses are filled with ice first, each person typically pours about 150 ml of coffee into a 300 ml glass to leave space for milk, leaving 100 ml or more in the jug for top-ups.
What if I do not have a dedicated ice bucket?
A small deep bowl works as a substitute. Choose one with a flat base so it sits stably on the tray. Avoid a shallow bowl because ice cubes can slide out easily when guests scoop with a spoon.
Original editorial guidance and recipe formulations, not independently kitchen-tested. Times are estimates and depend on equipment and product directions. Cooked bases need additional cooling and refrigeration before cold serving. Images are AI-generated illustrations; appearance and yield may vary. Check actual ingredient labels, allergens, and any certification you require. We do not certify products. Read our approach.
Save to Pinterest ↗ANOTHER IDEA FOR THE COUNTER