Weigh a Syrup Dose Over a Small Bowl Instead of Directly Over the Drink Glass
Pouring flavoured syrup directly from the bottle into a drink glass while trying to watch a digital scale is harder than it looks. The bottle tip drips onto the rim, the pour overshoots, and the reading is difficult to see past the bottle body. Placing a small tared bowl between the bottle and the glass solves all three problems at once. The technique takes one extra transfer step but produces a cleaner rim, an accurate dose, and a replicable result every time you make the same drink.
Read the note ↓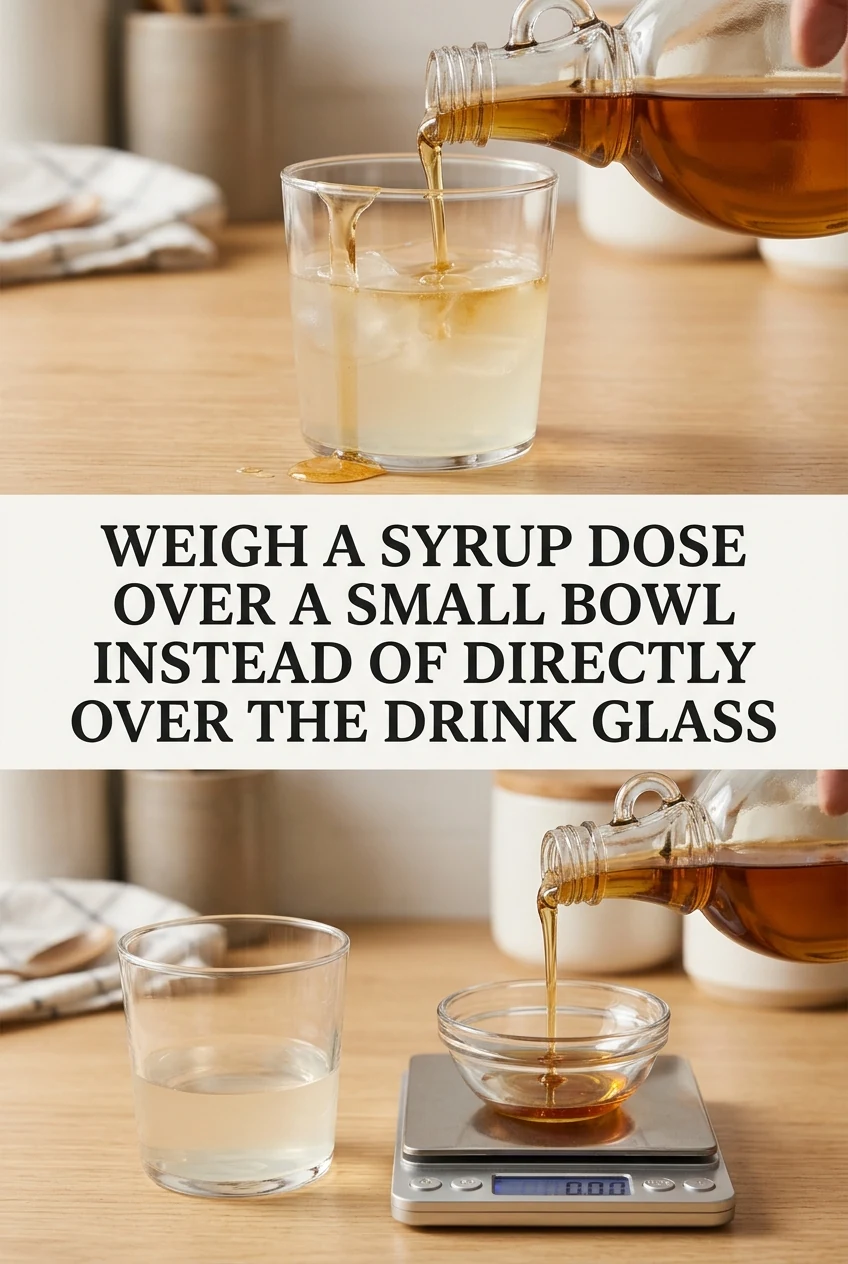
AI-generated editorial concept created for this article. The image is not a technical diagram or a tested result.
Choose a Bowl That Fits the Scale Platform
Use a ceramic or glass bowl small enough to sit fully on your scale platform without overhanging the edges. A bowl with an internal diameter of around 8 centimetres and a pouring lip works well for syrup doses between 10 and 30 millilitres. Avoid bowls with wide flat bases that obscure the scale display. Place the bowl on the scale, press the tare button to zero the reading, and confirm the display reads zero before you open the syrup bottle.
Pour the Syrup Into the Bowl, Not the Glass
Hold the syrup bottle over the tared bowl and pour slowly. Watch the scale display rather than the bottle. Stop pouring when the reading reaches your target weight. Sugar syrups are denser than water; a millilitre of typical simple syrup weighs roughly 1.2 to 1.3 grams, meaning a 15 millilitre dose registers around 18 to 20 grams on the scale. Check your recipe or product nutrition panel to confirm whether your target dose is specified by liquid volume or mass.
Transfer the Measured Dose Into the Drink Glass
Pick up the small bowl and pour the measured syrup into the drink glass in one smooth motion. Because the bowl has a pouring lip and you are not fighting the scale display simultaneously, the transfer is controlled and the glass rim stays clean. If a small drip lands on the bowl exterior rather than the glass, that is the bowl catching the mess rather than your drink rim. Wipe the bowl with a damp cloth between doses when making multiple drinks.
Use the Bowl to Catch Drips Between Pours
After transferring the syrup, set the syrup bottle upright in or beside the small bowl while you assemble the rest of the drink. Any residual drip from the bottle tip falls into the bowl rather than onto the counter or the drink glass rim. This is a minor but practical workflow detail that reduces sticky counter buildup during a busy preparation session. Rinse the bowl after each drink session so dried syrup does not affect the next tare reading.
Apply the Method to Different Syrup Formats
The bowl-and-scale method works equally well for pump-top bottles, squeeze bottles, and standard screw-cap bottles. With a pump bottle, one pump delivers a fixed volume, but the scale confirms whether that volume is consistent across pumps, which can vary as the bottle empties. As an illustrative example, if your pump is labelled for 10 millilitres but the scale reads 8 grams on a near-empty bottle, you know to add a partial second pump to reach your intended dose.
A little more
to know.
Does the bowl method work when I am making two or three drinks in a row?
Yes. Tare the bowl before each pour, measure the dose, transfer it, then tare again for the next drink. The process adds only a few seconds per drink and keeps every dose consistent without washing the bowl between each one unless you switch syrup flavours.
What if my scale only reads in 2-gram increments and I need a 10-gram dose?
A scale with 2-gram resolution is less precise for small doses. For a 10-gram target, stop pouring when the display first shows 10 grams. Avoid trying to split the difference between readings, as that introduces more error than the resolution itself. Consider a scale with 1-gram or finer resolution for syrup work.
Original editorial guidance and recipe formulations, not independently kitchen-tested. Times are estimates and depend on equipment and product directions. Cooked bases need additional cooling and refrigeration before cold serving. Images are AI-generated illustrations; appearance and yield may vary. Check actual ingredient labels, allergens, and any certification you require. We do not certify products. Read our approach.
Save to Pinterest ↗ANOTHER IDEA FOR THE COUNTER