Still Watermelon and Basil Cooler Strained Into a Serving Jug
A ripe watermelon holds a remarkable amount of water inside its flesh, and that natural juice needs very little encouragement to flow freely. The challenge is keeping the finished drink clear and bright rather than thick and murky. Blending briefly, straining through a fine-mesh sieve, and then steeping whole basil leaves in the cold strained liquid are the three moves that address both problems at once. This article walks through one illustrative plan for assembling the cooler in a standard serving jug, with notes on timing and proportion so the result is practical to repeat.
Read the note ↓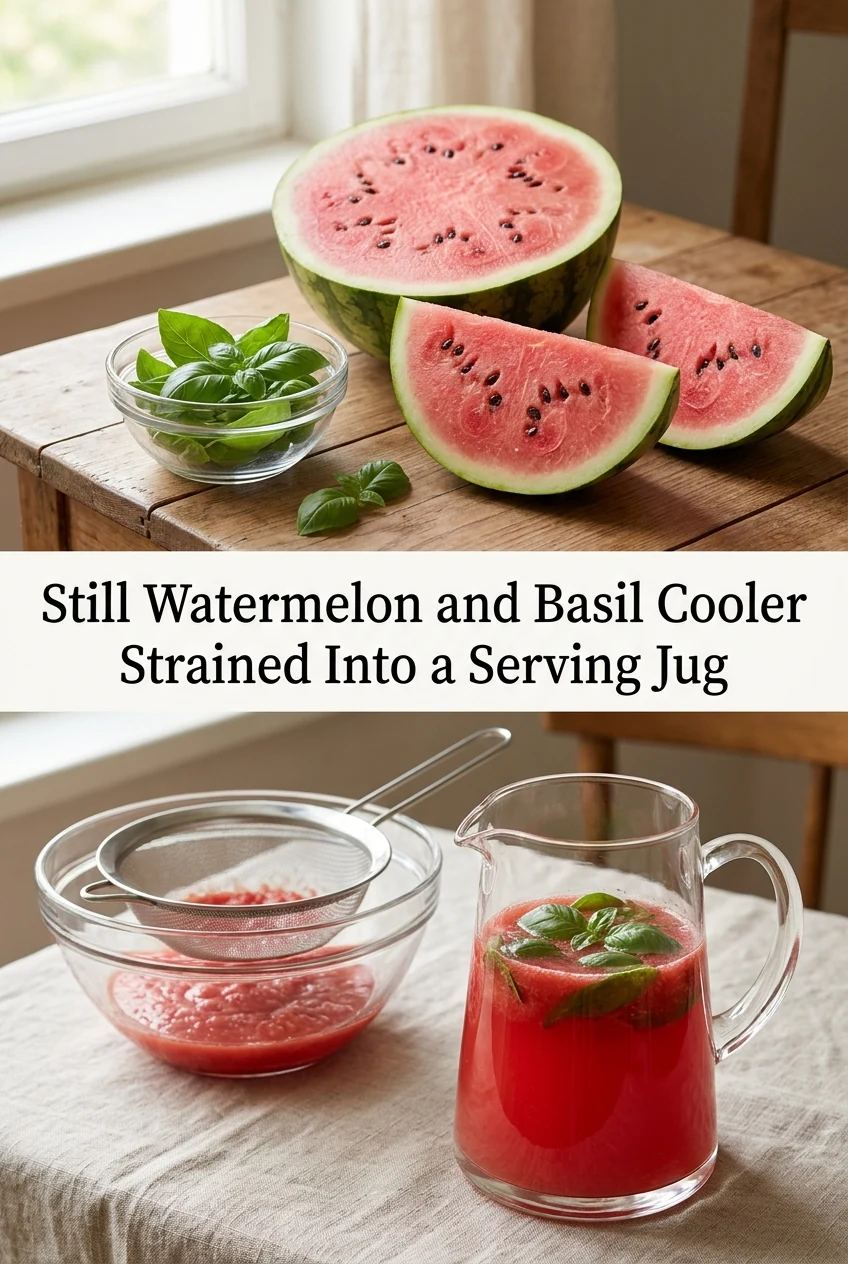
AI-generated editorial concept created for this article. The image is not a technical diagram or a tested result.
Why Watermelon Turns Murky and How Straining Fixes It
Watermelon flesh is mostly water held inside soft cell walls. When those walls are broken by a blender, they release both juice and fine pulp particles. Left together, the particles stay suspended and give the drink a cloudy, slightly grainy texture. Passing the blended mixture through a fine-mesh sieve separates the clear juice from the pulp. The juice that drips through is noticeably more translucent and has a cleaner flavour on the palate. A second pass through the sieve, or a light press with the back of a spoon to encourage flow without forcing pulp through, can improve clarity further. The pulp left behind can be composted or used in a smoothie separately. This step is the single most effective way to control the texture of the finished drink.
Choosing and Preparing the Watermelon
Select a watermelon that feels heavy for its size and produces a deep, hollow sound when tapped. A pale yellow field spot on the underside is a common indicator of ripeness, though it is not a guarantee. For a standard 1.5-litre serving jug filled to a comfortable serving level, roughly 800 grams of prepared watermelon flesh is a useful starting point. That weight typically yields somewhere in the range of 550 to 650 millilitres of strained juice, depending on the individual fruit and how firmly the pulp is pressed. Remove the rind, cut the flesh into rough chunks, and pick out any seeds you can see. Chill the chunks in the refrigerator for at least an hour before blending so the juice is already cold when it hits the jug.
Blending Briefly and Straining Into the Jug
Place the chilled watermelon chunks in a blender and run it on a low to medium setting for around ten to fifteen seconds. The goal is to break the flesh into liquid without over-processing it into foam. Foam introduces air bubbles that make the drink look less appealing and take time to settle. Set the fine-mesh sieve over the mouth of the serving jug and pour the blended mixture through in batches. Allow gravity to do most of the work. If you use the back of a spoon to press gently, stop before the pulp begins to push through the mesh. Discard the pulp in the sieve and repeat until all the blended liquid has been strained. Top the jug with cold still water if you want a lighter, less sweet drink; a ratio of roughly one part water to three parts watermelon juice is one illustrative starting point, not a fixed rule.
Steeping Whole Basil Leaves Instead of Blending Them
Basil bruises the moment it is cut or blended, releasing chlorophyll and turning the surrounding liquid green and bitter within minutes. Keeping the leaves whole and simply dropping them into the cold strained juice is a gentler approach. The cold temperature slows the transfer of flavour, which means the leaves need time to steep rather than releasing everything instantly. A handful of eight to twelve medium whole basil leaves placed in the jug and left in the refrigerator for twenty to thirty minutes gives a subtle, clean herbal note without bitterness. Taste the liquid at the twenty-minute mark and remove the leaves if the flavour is already where you want it. Because this is an illustrative plan rather than a tested result, the exact steeping time that suits your palate may differ.
Serving Over Ice Within a Short Window
Watermelon juice separates as it sits, with lighter liquid rising and denser particles settling. Give the jug a gentle stir before pouring. Fill glasses with ice first, then pour the cooler over the ice so the cold slows any further separation in the glass. A small pinch of fine salt added to the jug before serving can sharpen the watermelon flavour without making the drink taste salty; this is optional and worth adjusting to preference. Because the juice is fresh and unstrained pulp can still carry some natural sugars that ferment at room temperature, the drink is best served on the day it is made and kept refrigerated until the moment of serving. Do not rely on this preparation as a shelf-stable product.
A little more
to know.
Can I add a sweetener to the cooler if the watermelon is not very sweet?
Yes. A small amount of simple syrup made from sugar and water stirred together until dissolved can be added to the strained juice a little at a time. Taste as you go rather than adding a fixed quantity, because the sweetness of individual watermelons varies considerably. Avoid adding undissolved granulated sugar directly to the cold juice, as it is unlikely to dissolve evenly at low temperatures.
Is it possible to use a nut-milk bag instead of a fine-mesh sieve?
A nut-milk bag can work as an alternative straining tool. Pour the blended watermelon into the bag held over the jug and allow the juice to drip through. Squeezing the bag gently can speed up the process, though pressing too firmly may push fine pulp particles through the fabric and reduce clarity. The result is likely to be similar to sieve straining, though the exact clarity will depend on the weave of the specific bag you use.
Original editorial guidance and recipe formulations, not independently kitchen-tested. Times are estimates and depend on equipment and product directions. Cooked bases need additional cooling and refrigeration before cold serving. Images are AI-generated illustrations; appearance and yield may vary. Check actual ingredient labels, allergens, and any certification you require. We do not certify products. Read our approach.
Save to Pinterest ↗ANOTHER IDEA FOR THE COUNTER