Set Up a Small Matcha Station With Three Dedicated Tools
A bamboo whisk, a small fine-mesh sifter, and a flat-bottomed bowl are the three tools that make consistent matcha preparation possible at home. Keeping them together on a dedicated tray separates them from coffee equipment, which can carry oils and residue that alter matcha's flavor. This guide explains how to arrange those three tools so each preparation step flows directly into the next without reaching across the counter or hunting for items.
Read the note ↓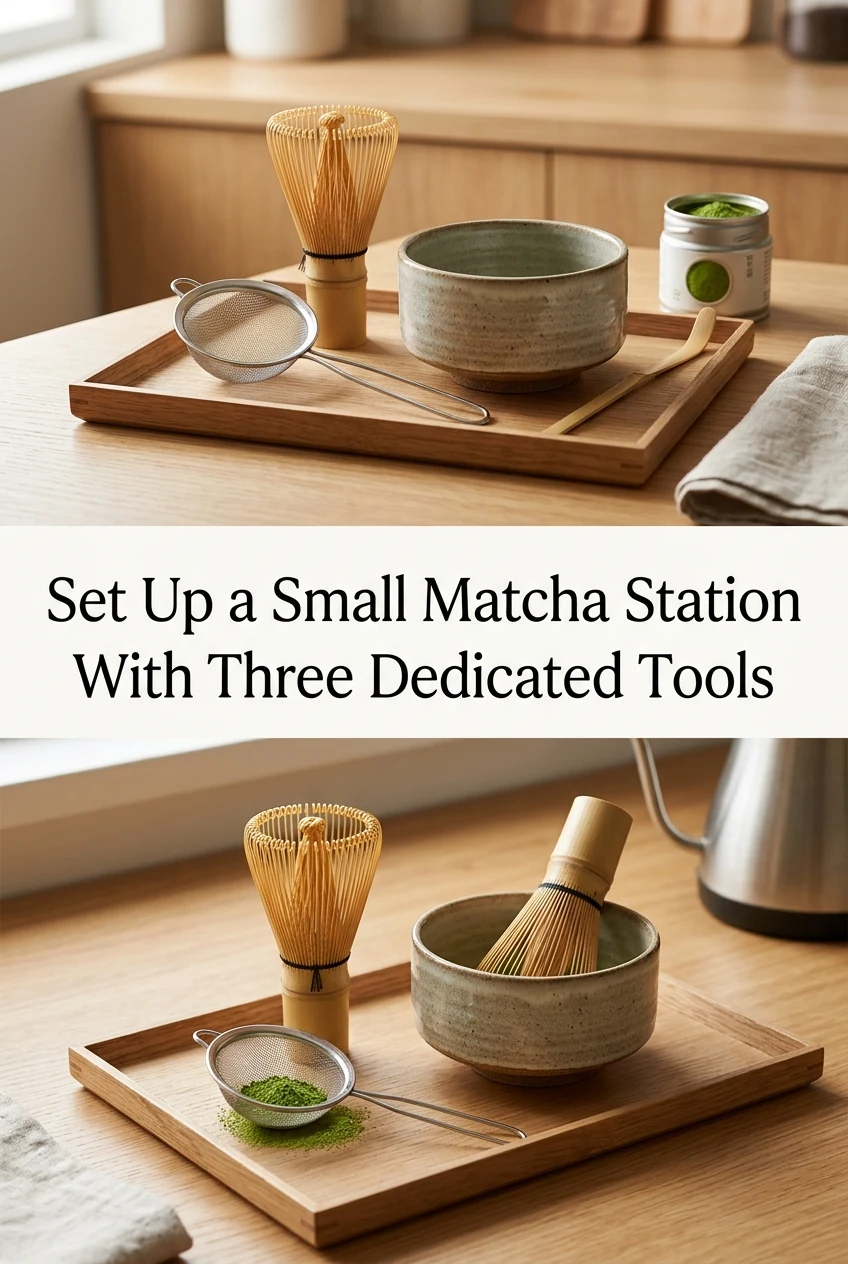
AI-generated editorial concept created for this article. The image is not a technical diagram or a tested result.
Choose a Tray That Fits All Three Items Without Stacking
A rectangular tray roughly 30 cm by 20 cm holds the bowl, sifter, and whisk side by side without crowding. Place the sifter on the left, the bowl in the center, and the whisk to the right. This left-to-right order mirrors the preparation sequence: sift first, whisk second, drink third. A tray with a low lip prevents items from sliding but still allows easy lifting of each tool. Cork or silicone tray liners reduce noise and keep the whisk from rolling.
Position the Sifter So It Rests Directly Over the Bowl
A small single-cup sifter with a handle rests across the rim of a 300 ml flat-bottomed bowl without needing a separate stand. Measure roughly 1 to 2 grams of matcha powder into the sifter before each session. Pressing the powder gently through the mesh with a small spoon breaks up clumps that would otherwise float on the water surface and resist whisking. Sifting takes under thirty seconds and directly affects how smoothly the final drink blends.
Store the Bamboo Whisk Upright Between Uses
A bamboo whisk holder, sometimes called a kusenaoshi, keeps the tines curved correctly when the whisk is not in use. If you do not have one, rest the whisk handle-down in a small cup so the tines point upward and do not press against any surface. Before whisking, briefly rinse the tines in warm water to soften the bamboo. Do not soak the whisk or leave it submerged, as prolonged water contact weakens the bamboo and shortens its useful life.
Keep the Flat-Bottomed Bowl Separate From Coffee Cups
A flat-bottomed bowl with a diameter of roughly 12 cm gives the whisk enough room to move in a brisk W or zigzag motion without the tines hitting the sides. Ceramic or unglazed clay bowls are common choices. Whichever material you use, wash it separately from coffee equipment and dry it fully before returning it to the tray. Even trace coffee oils on the bowl surface can introduce bitterness that competes with matcha's natural grassy flavor.
Add Water at the Right Temperature Before Whisking
Water between 70 and 80 degrees Celsius is a widely used starting range for matcha preparation, though individual preferences vary. Pour approximately 60 to 80 ml of water over the sifted powder in the bowl. Whisk immediately using quick back-and-forth strokes for about 20 to 30 seconds until a light foam forms on the surface. For a longer drink, transfer the whisked matcha into a glass before adding cold milk or water over ice. The tray keeps this two-vessel workflow contained.
A little more
to know.
Can the same flat-bottomed bowl be used for both whisking and drinking?
Yes. Many traditional preparations serve matcha directly in the whisking bowl. If you prefer this, choose a bowl with a capacity of at least 250 ml so there is room to whisk without splashing over the rim.
How often should the bamboo whisk be replaced?
Replace the whisk when tines begin to break off or when the tips fray significantly. With regular gentle use and proper drying, a bamboo whisk typically remains functional for several months before visible deterioration affects whisking performance.
Original editorial guidance and recipe formulations, not independently kitchen-tested. Times are estimates and depend on equipment and product directions. Cooked bases need additional cooling and refrigeration before cold serving. Images are AI-generated illustrations; appearance and yield may vary. Check actual ingredient labels, allergens, and any certification you require. We do not certify products. Read our approach.
Save to Pinterest ↗ANOTHER IDEA FOR THE COUNTER