Prepare a Small Pineapple and Mint Still Cooler by Juicing and Straining Into a Serving Jug
Fresh pineapple blended without straining leaves fibrous pulp suspended in the glass, giving the drink a grainy texture that distracts from the clean fruit flavour. Straining the blended pineapple through a fine-mesh sieve before adding mint and measured still water produces a smooth, bright cooler that pours clearly into each glass. This guide covers the preparation sequence, the straining step, and how to portion the drink accurately for a small serving jug.
Read the note ↓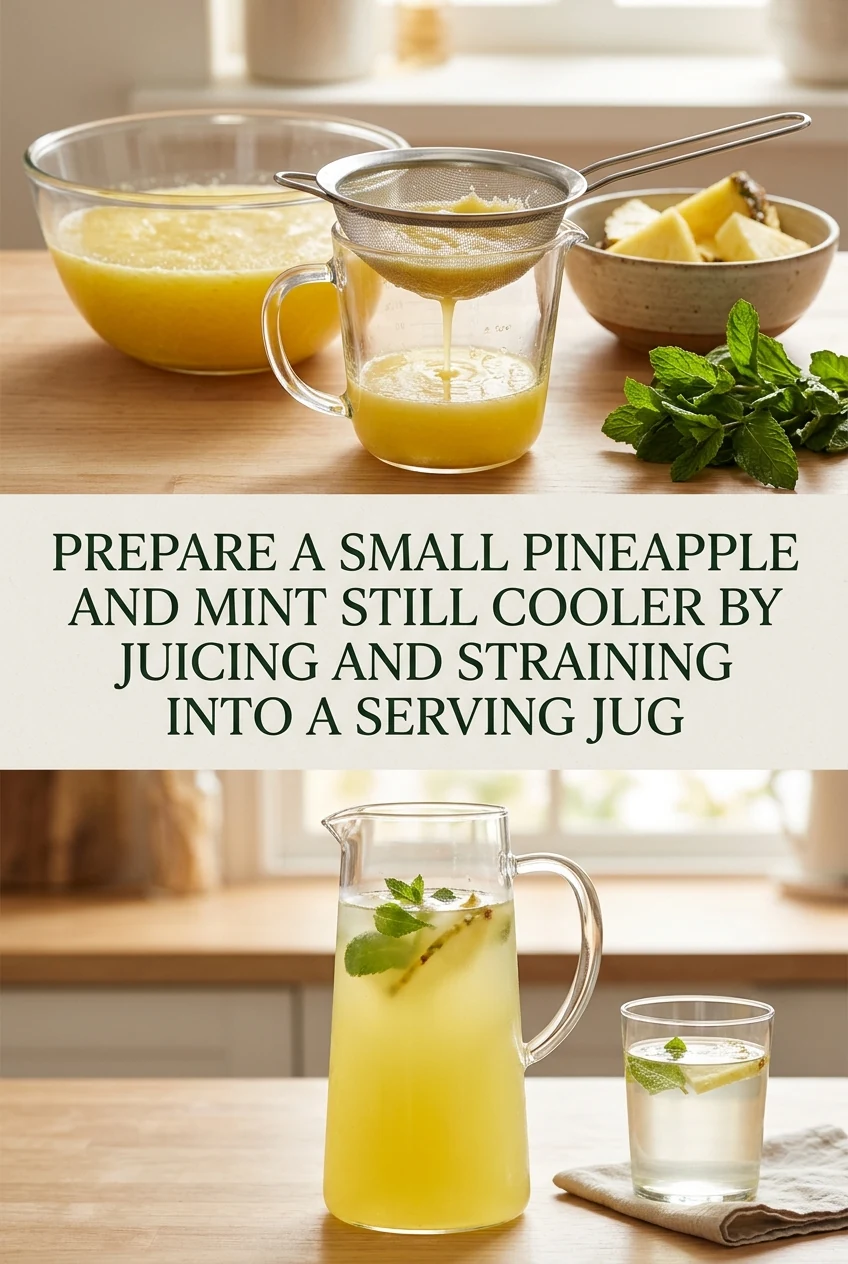
AI-generated editorial concept created for this article. The image is not a technical diagram or a tested result.
Choose and Prepare the Pineapple
Use ripe fresh pineapple with the skin and core removed. The core is tougher and blends less smoothly, so cutting it away before blending reduces the fibre load going into the sieve. For a 750-millilitre serving jug, roughly 300 grams of peeled, cored pineapple flesh provides a good fruit-forward base without overwhelming the mint. Cut the flesh into small chunks so the blender processes it evenly rather than leaving large unblended pieces near the blade.
Blend and Strain Out the Fibre
Blend the pineapple chunks with 100 millilitres of cold still water to help the blender run smoothly. Pour the blended mixture through a fine-mesh sieve set over a bowl or measuring jug, pressing gently with a spoon to push liquid through without forcing pulp. Discard the dry fibre left in the sieve. This step is what separates a smooth cooler from a grainy one. With the blending water included, expect to yield approximately 300 to 330 millilitres of strained liquid, though this varies with ripeness.
Add Mint Without Bruising It Into the Liquid
Tear six to eight fresh mint leaves and add them to the strained juice in the jug. Avoid blending or muddling the mint directly into the liquid, as this releases chlorophyll and turns the drink green and slightly bitter over time. Tearing the leaves gently releases aroma without breaking down the leaf structure. Let the mint rest in the juice for five minutes before adding the remaining water, which gives the flavour time to infuse without over-steeping.
Measure and Add the Remaining Water
After the mint has infused, add still water to bring the total volume to 750 millilitres. This means adding approximately 420 to 450 millilitres of water on top of the strained juice, depending on your actual juice yield. Stir gently once to combine. Taste before serving; if the drink is too sharp, add a small amount of water rather than sugar, which changes the character of the cooler. Serve over ice in individual glasses rather than adding ice to the jug, which dilutes the batch unevenly.
Serve Promptly and Store Correctly
Fresh pineapple juice is perishable. Serve the cooler within two hours of preparation if kept at room temperature, or refrigerate the jug at 4 degrees Celsius or below and use within the same day. Do not leave the jug out for more than one hour if the ambient temperature exceeds 32 degrees Celsius. Remove the mint leaves before refrigerating to prevent the infusion from becoming bitter as it sits. Pour through the sieve again if any fine pulp has settled before serving the last glasses.
A little more
to know.
Can I prepare the strained pineapple juice the night before and add the mint on the day?
Store the strained juice covered in the refrigerator at 4 degrees Celsius or below overnight. Add the mint and water on the day of serving. Juice stored this way should be used within 24 hours for best flavour and safety.
What if my sieve lets fine pulp through and the drink still looks cloudy?
Line the sieve with a single layer of clean muslin or a nut-milk bag and strain a second time. This catches finer particles that a standard mesh misses and produces a noticeably clearer result in the glass.
Original editorial guidance and recipe formulations, not independently kitchen-tested. Times are estimates and depend on equipment and product directions. Cooked bases need additional cooling and refrigeration before cold serving. Images are AI-generated illustrations; appearance and yield may vary. Check actual ingredient labels, allergens, and any certification you require. We do not certify products. Read our approach.
Save to Pinterest ↗ANOTHER IDEA FOR THE COUNTER