Keep a Small Notebook Column for Each Syrup Batch Date and Volume
Home syrup batches are easy to lose track of once two or three jars sit in the same refrigerator shelf. A simple notebook column recording the date made, the yield in millilitres and the jar position costs almost no time and prevents using a newer batch while an older one quietly degrades. This guide explains how to set up that column, what to record and how to act on the information during a busy morning service.
Read the note ↓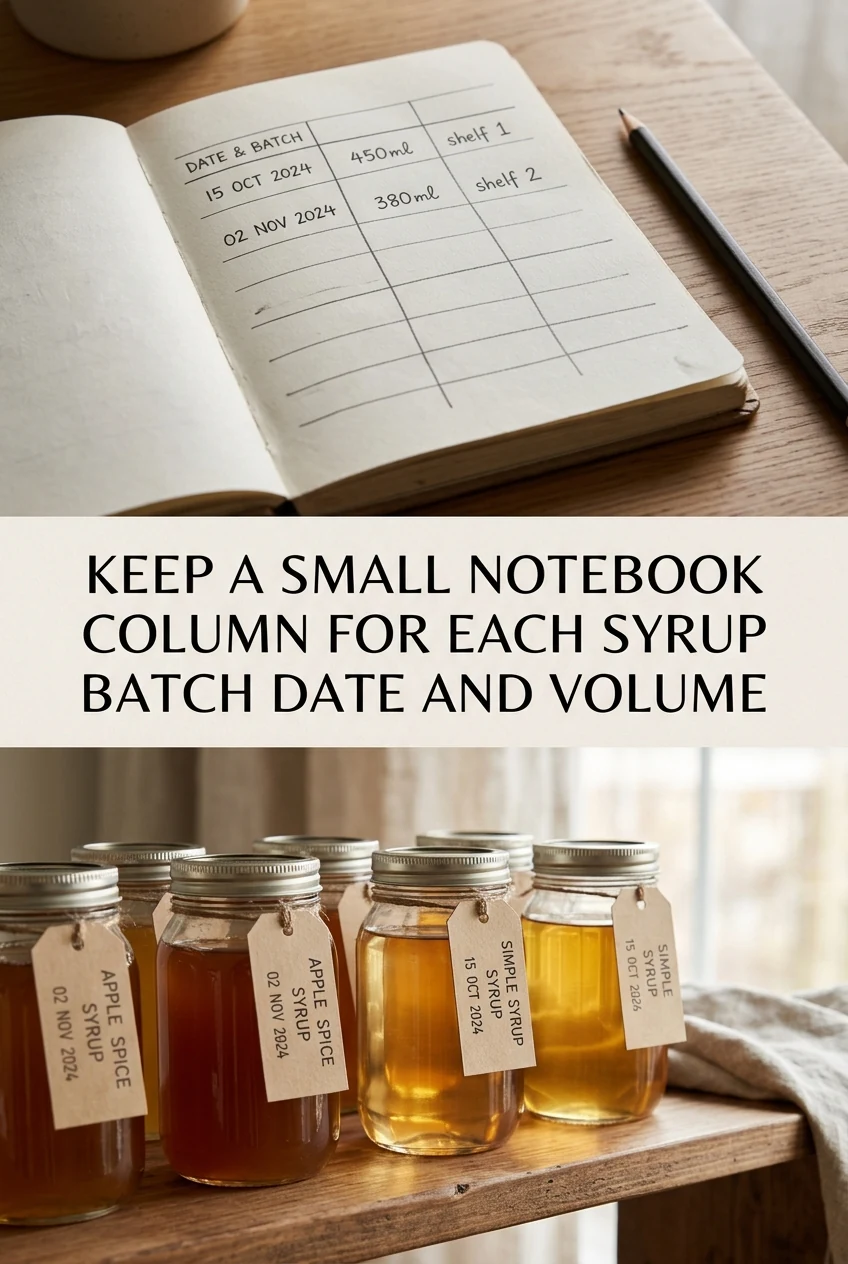
AI-generated editorial concept created for this article. The image is not a technical diagram or a tested result.
Set Up a Three-Column Layout Before Your First Batch
Rule three columns across a single notebook page: Date Made, Volume in mL and Fridge Position. Keep the columns narrow so one page covers many batches. Write the syrup name as a row header above each group of entries rather than repeating it in every row. This layout lets you scan down a single column to find the oldest date without reading across the whole page. Prepare the page before you cook the syrup so recording takes only seconds while the batch cools.
Measure Yield Into the Jar Before Sealing
Pour the finished syrup into a measuring jug before transferring it to the storage jar. Note the volume while it is still in the jug because reading a graduated jar through glass is less accurate. A typical small simple syrup batch using 200 g sugar and 200 mL water yields roughly 300 to 320 mL after dissolving and a brief simmer, though actual yield varies with evaporation time. Record that number immediately. Rounding to the nearest 10 mL is precise enough for home use.
Assign a Fridge Position and Write It Down
Choose a consistent shelf zone for syrups, for example the upper-left area of the top shelf, and divide it into numbered spots if you keep more than two jars. Write the spot number in the third column. When you open the refrigerator the next morning, you can match the notebook entry to the physical jar without lifting every container. This matters most when jars look similar. Label the jar lid with a small piece of masking tape showing only the batch number, which links back to the notebook row.
Use the Oldest Entry First and Cross It Out When Empty
Before each service session, glance at the notebook and identify the earliest date in the current syrup group. Pull that jar to the front of the shelf. When the jar is empty, draw a single line through the entire row rather than erasing it. The crossed-out row becomes a useful history showing how long a batch lasted, which helps you decide whether to make a larger or smaller quantity next time. Avoid leaving a row blank or ambiguous, as that creates the same confusion the notebook is meant to solve.
Refrigerate Promptly and Note Any Delay
Refrigerate finished syrup within two hours of cooking, or within one hour if your kitchen is above 32 degrees Celsius. If an unusual delay occurred, note it briefly in the margin next to that row, for example writing a short phrase like cooled slowly. This does not make the syrup safe or unsafe by itself, but it gives you context when deciding whether to use a batch that looks or smells different later. Prompt refrigeration at 4 degrees Celsius or below is the standard practice for perishable sugar syrups.
A little more
to know.
Can I use a phone note instead of a paper notebook?
Yes, a phone note or simple spreadsheet works the same way. The key is that the record is opened and updated during the batch, not recalled from memory later. Choose whichever format you will actually use consistently.
How long do home sugar syrups typically keep when refrigerated properly?
This depends on the sugar concentration, any added ingredients and how cleanly the jar was filled. Many plain simple syrups remain usable for one to two weeks. Check for cloudiness, off smell or mould before each use and discard if any appear.
Original editorial guidance and recipe formulations, not independently kitchen-tested. Times are estimates and depend on equipment and product directions. Cooked bases need additional cooling and refrigeration before cold serving. Images are AI-generated illustrations; appearance and yield may vary. Check actual ingredient labels, allergens, and any certification you require. We do not certify products. Read our approach.
Save to Pinterest ↗ANOTHER IDEA FOR THE COUNTER