Shortbread Fingers for a Coffee Tray: Cutting, Chilling and Baking Evenly
Homemade shortbread that spreads into irregular shapes, browns only at the corners, or crumbles when lifted off the tray is usually a problem of inconsistent thickness, skipped chilling, or imprecise cutting rather than a flawed recipe. Getting neat fingers that sit evenly beside espresso cups requires a few deliberate steps before the tray goes into the oven. This guide covers patting the dough to a uniform depth, chilling it until firm, cutting with a consistent guide, and reading doneness by edge color rather than guessing.
Read the note ↓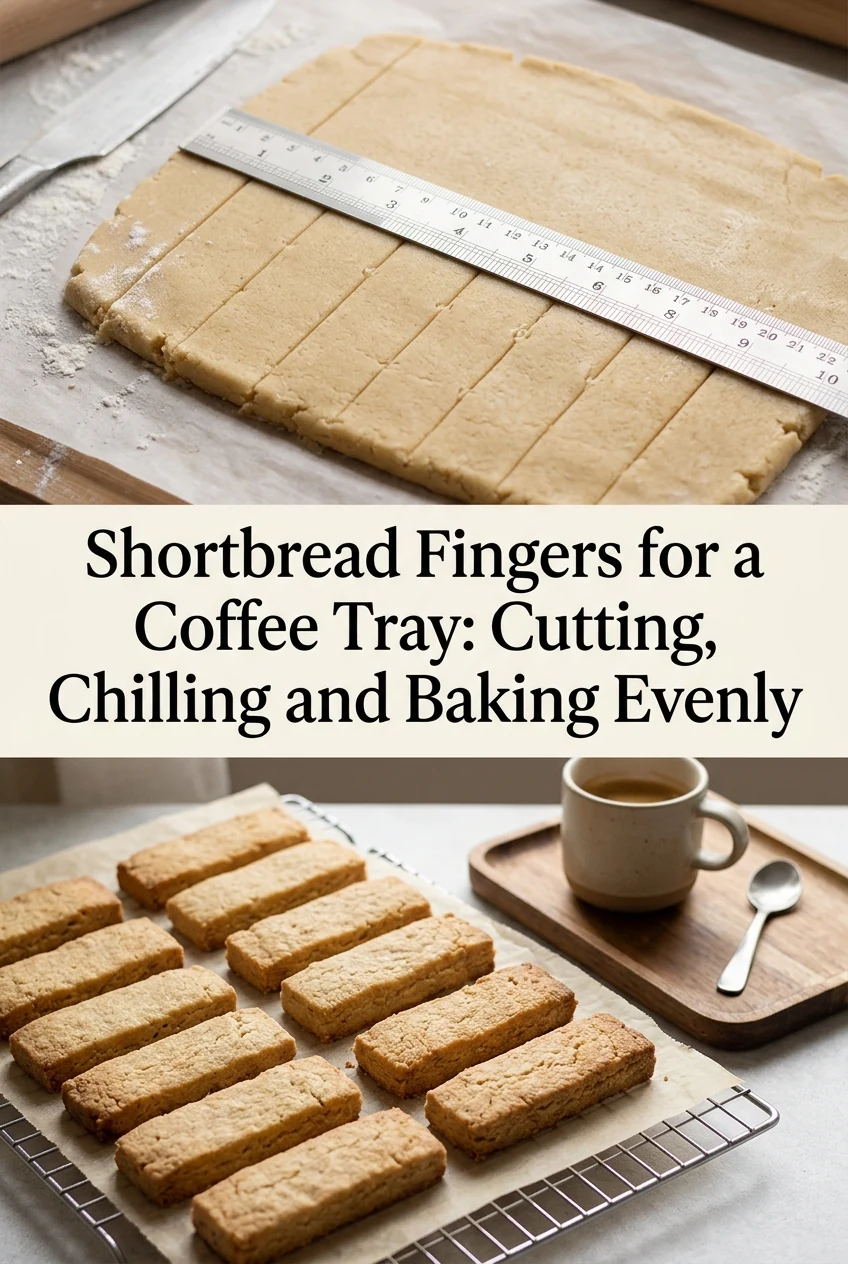
AI-generated editorial concept created for this article. The image is not a technical diagram or a tested result.
Patting Dough to a Consistent Thickness
Press the dough into a parchment-lined rectangular baking pan rather than rolling it on a floured surface, which can add uneven extra flour. Use your palm and then the flat bottom of a measuring cup to press the dough into the corners and across the surface. Aim for an even depth of about 1 cm throughout. Uneven dough means thinner areas bake faster and brown before thicker sections are done. A consistent depth is the single most important factor in getting fingers that finish at the same time.
Why Chilling Before Cutting Matters
Butter-rich dough is soft at room temperature and will drag and smear when a knife passes through it, blurring the edges. Refrigerating the pressed dough for 20 to 30 minutes firms the fat so the dough holds a clean line when cut. The chilled dough also holds its shape better in the oven during the first minutes of baking before the structure sets. Do not skip this step even if the dough feels workable; the difference in edge definition after baking is visible and affects how the finished tray looks.
Cutting Fingers with a Ruler or Bench Scraper
Remove the chilled pan from the refrigerator and use a ruler or the straight edge of a bench scraper to mark and then cut the dough into fingers of equal width, for example 2 cm wide and 7 cm long. A ruler placed along the dough surface gives a consistent guide for each cut. Press straight down with a sharp knife rather than dragging it. Wipe the blade between cuts to prevent buildup. Prick each finger two or three times with a fork to allow steam to escape and reduce puffing.
Judging Doneness by Edge Color
Shortbread is done when the edges turn a pale golden color and the surface looks set and dry rather than shiny or soft. The center will still feel slightly soft when pressed lightly with a fingertip but will firm as it cools. Oven temperatures vary, so use your recipe's stated time as a starting point and begin checking a few minutes early. Do not rely on a single visual cue alone; combine edge color, surface appearance, and timing from your own oven to make the call.
Cooling and Lifting Without Breaking
Shortbread is fragile when hot because the butter is still liquid inside. Leave the fingers in the pan on a wire rack for 10 minutes before attempting to lift them. After that initial rest, use a thin offset spatula or palette knife to slide under each finger and transfer it to the rack. If a finger cracks during lifting, it was likely either underbaked or lifted too soon. Do not taste raw shortbread dough; it contains raw flour and uncooked butter, both of which carry food safety considerations.
A little more
to know.
Can I cut the fingers after baking instead of before?
Cutting after baking is possible but the shortbread will crumble along the cut line because the baked structure is brittle. Pre-cutting before baking gives cleaner edges and allows the cut lines to set during baking, making separation much easier and neater.
My oven browns the back of the pan faster than the front. How do I handle that?
Rotate the pan halfway through the baking time, turning it 180 degrees. This exposes both ends of the pan to the hotter zone equally. Check your recipe notes on timing and adjust based on what you observe in your specific oven over a couple of bakes.
Original editorial guidance and recipe formulations, not independently kitchen-tested. Times are estimates and depend on equipment and product directions. Cooked bases need additional cooling and refrigeration before cold serving. Images are AI-generated illustrations; appearance and yield may vary. Check actual ingredient labels, allergens, and any certification you require. We do not certify products. Read our approach.
Save to Pinterest ↗ANOTHER IDEA FOR THE COUNTER