Set Up a Dedicated Drying Rack Position for Tall Glasses and Blender Jars
Tall glasses and blender jars tip or knock against mugs when placed randomly on a shared drying rack. Assigning each a fixed position takes about five minutes to plan and helps prevent chips, watermarks from contact, and the frustration of hunting for a dry vessel when you want to start a drink session quickly. This guide walks through how to choose positions, arrange items efficiently, and maintain the system without rearranging the rack every day.
Read the note ↓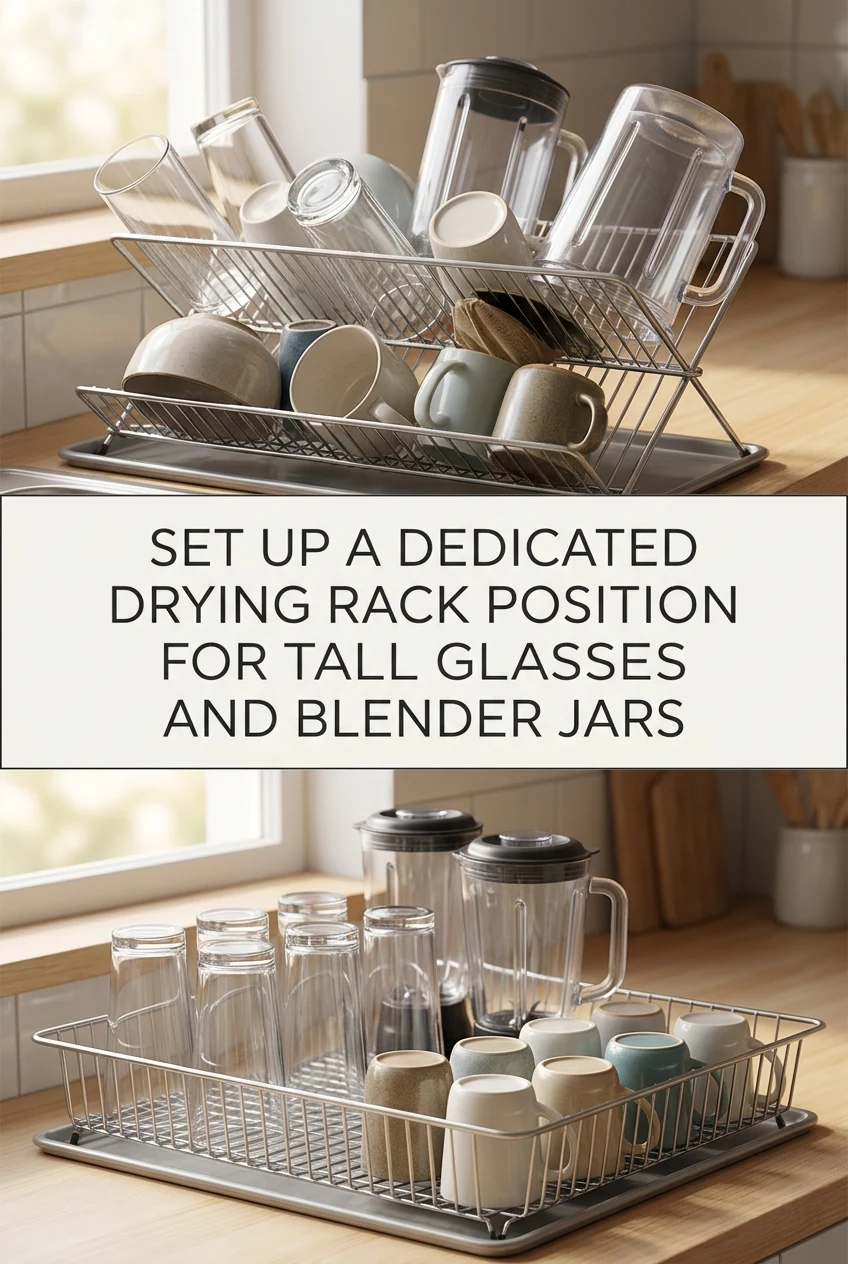
AI-generated editorial concept created for this article. The image is not a technical diagram or a tested result.
Assess Your Rack Geometry Before Placing Anything
Stand your tallest glass and your blender jar beside the empty rack and note their heights against the rack tiers. Most two-tier racks reserve the upper rail for mugs; tall glasses often exceed that clearance. Identify the back corner of the lower tier as the natural tall-item zone because it is furthest from the edge and least likely to be bumped when other items are added or removed during a normal wash session.
Assign the Blender Jar Its Own Corner With Mouth Facing Down
Place the blender jar mouth-down on the lower tier back corner so water drains freely through the opening rather than pooling inside. Leave at least four centimetres of clearance on each side so the jar does not press against glasses. If your rack uses a drip tray, confirm the jar rim sits flat across the rack rods rather than bridging two rods at an awkward angle, which causes rocking and contact with neighbours.
Position Tall Glasses in a Single File Row Beside the Jar
Stand tall glasses upright or inverted depending on whether your rack has prongs. Inverted is preferred because it drains the interior and keeps dust out while drying. Arrange them in a single file row running alongside the blender jar toward the front of the rack, spacing each glass roughly three centimetres apart. A row of three tall glasses fits comfortably along the depth of a standard lower tier without touching.
Keep Shorter Items on the Upper Tier or Opposite End
Mugs, espresso cups, and small bowls belong on the upper tier or the opposite end of the lower tier. This separation means you can remove a mug without reaching over or past tall glasses. It also means the tall-item zone stays visually distinct, so anyone helping with washing knows immediately where each category goes without needing verbal instruction each time.
Maintain the System by Resetting After Each Session
The system only works if items return to their assigned positions after being put away. After each drink session, take thirty seconds to check that the blender jar corner and the tall-glass row are clear and ready. If a guest places a pot in the tall-item zone, move it before the next wash. Consistency over several days makes the layout instinctive and removes the decision-making step entirely from your prep routine.
A little more
to know.
What if my blender jar has a handle that sticks out and blocks the glass row?
Orient the jar so the handle faces the wall or the back edge of the rack rather than toward the glass row. This keeps the handle out of the path you use to place and remove glasses without changing the jar's drainage position.
Should I dry the blender jar with a cloth instead of rack drying?
Cloth drying is fine for the exterior, but the interior of a blender jar is difficult to dry completely with a cloth without leaving lint. Rack drying mouth-down after a cloth wipe of the outside gives the interior time to air-dry fully.
Original editorial guidance and recipe formulations, not independently kitchen-tested. Times are estimates and depend on equipment and product directions. Cooked bases need additional cooling and refrigeration before cold serving. Images are AI-generated illustrations; appearance and yield may vary. Check actual ingredient labels, allergens, and any certification you require. We do not certify products. Read our approach.
Save to Pinterest ↗ANOTHER IDEA FOR THE COUNTER