Prepare a Small Taro and Coconut Milk Warm Cup on the Stovetop
Taro powder mixed directly into hot coconut milk almost always forms stubborn lumps that no amount of stirring fully resolves. The fix is straightforward: combine the powder with a small cold portion of the coconut milk first, work it into a smooth paste, then whisk that paste into the gently heated remainder. This two-stage approach takes only a few extra minutes and produces a consistently smooth, warm cup without the grainy texture that frustrates so many first attempts with taro powder.
Read the note ↓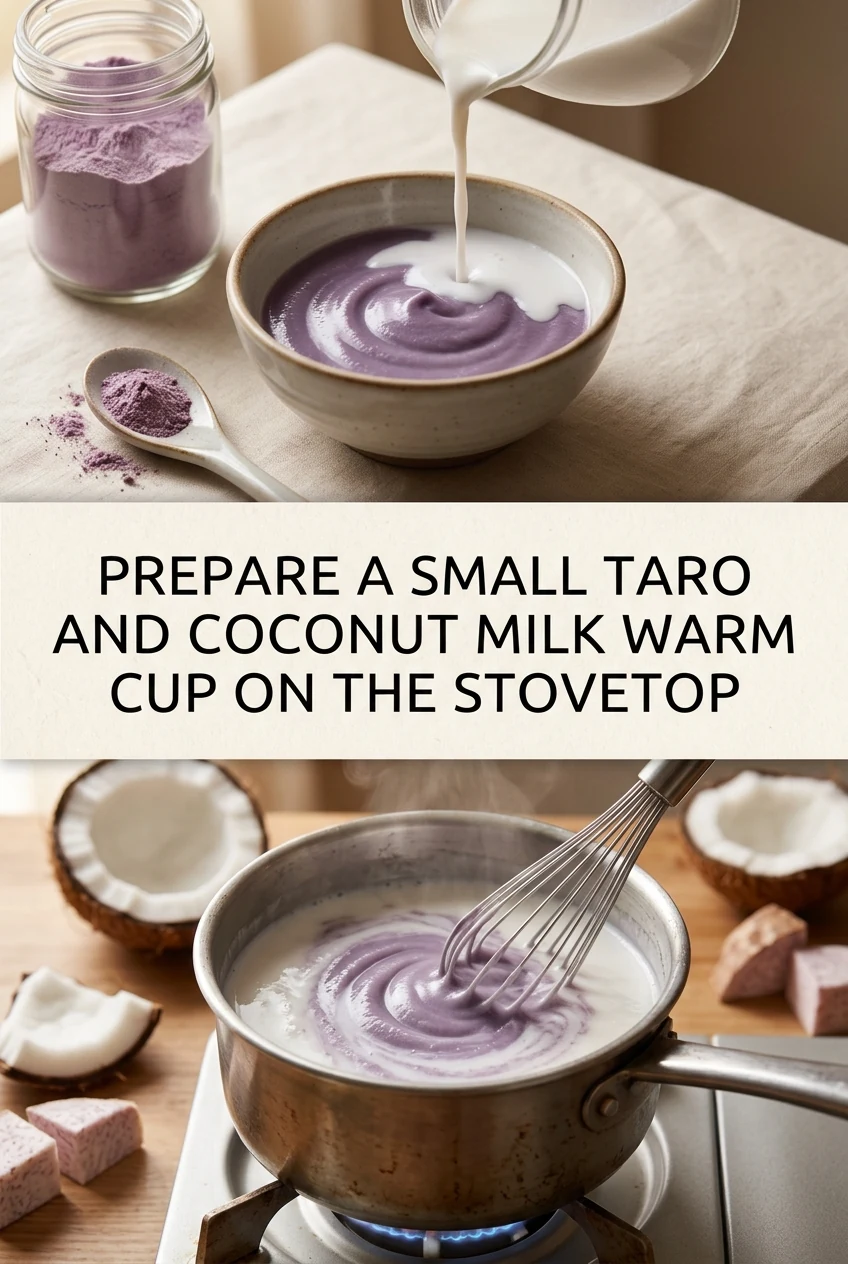
AI-generated editorial concept created for this article. The image is not a technical diagram or a tested result.
Measure Your Ingredients Before Heating
For a single 240 ml serving, measure 200 ml of canned or carton coconut milk and set aside 40 ml of it in a small cup at room temperature. Measure 2 tablespoons (approximately 18 to 20 g) of taro powder into a separate small bowl. Having everything portioned before any heat is applied keeps the process controlled. Coconut milk from a can should be shaken or stirred before measuring, as the cream and liquid separate during storage.
Making the Paste
Add the 40 ml of cold coconut milk to the taro powder in small additions, stirring with a spoon after each addition. Work the mixture until it resembles a thick, smooth paste with no visible dry powder. This usually takes about one minute of active stirring. If the paste feels too stiff to stir easily, add a few extra drops of cold coconut milk. The goal is full hydration of the powder before it contacts heat, which prevents the starch granules from seizing into lumps.
Heating the Remaining Coconut Milk
Pour the remaining 160 ml of coconut milk into a small saucepan. Heat over low to medium-low heat, stirring occasionally, until it is steaming and just beginning to show small bubbles at the edges. Do not bring it to a rolling boil, as prolonged high heat can cause coconut milk to separate. A gentle simmer is sufficient to dissolve the paste and warm the drink to a comfortable serving temperature. Remove the pan from heat if it begins to bubble vigorously.
Combining Paste and Hot Coconut Milk
Remove the saucepan from the heat briefly. Add the taro paste in one addition and whisk immediately and continuously for about thirty seconds. Return the pan to low heat and whisk for a further thirty to forty-five seconds until the mixture is fully uniform and steaming. Taste and adjust sweetness at this point. Many taro powders contain added sugar, so taste before adding any more. Pour into a pre-warmed cup and serve promptly.
Adjusting Consistency and Sweetness
Taro powder brands vary in starch content, so the finished drink may be thinner or thicker than expected. For a thinner result, add a small splash of warm water or additional coconut milk. For a thicker, creamier texture, use full-fat canned coconut milk rather than a carton drink. If extra sweetness is needed, a small amount of sugar dissolved directly into the hot liquid works well. Refrigerate any unused coconut milk promptly, covered, at 4 degrees Celsius or below.
A little more
to know.
Can I use coconut cream instead of coconut milk for a richer result?
Coconut cream works but produces a significantly thicker, richer drink. Reduce the taro powder slightly to maintain a drinkable consistency, and use the same cold-paste method. Coconut cream is more prone to separating over heat, so keep the temperature low throughout.
Why does my finished drink still have a slightly gritty texture even after whisking?
Some taro powders contain coarser starch particles that resist full dissolution. Passing the finished drink through a fine mesh strainer before pouring into the cup removes residual texture. This step adds less than a minute and noticeably improves the mouthfeel.
Original editorial guidance and recipe formulations, not independently kitchen-tested. Times are estimates and depend on equipment and product directions. Cooked bases need additional cooling and refrigeration before cold serving. Images are AI-generated illustrations; appearance and yield may vary. Check actual ingredient labels, allergens, and any certification you require. We do not certify products. Read our approach.
Save to Pinterest ↗ANOTHER IDEA FOR THE COUNTER