Mix an Iced Cocoa Drink in a Glass with Room to Stir
An iced cocoa drink made directly in the serving glass is a straightforward project when you plan the order of steps carefully. The central challenge is dissolving cocoa powder and sugar completely before cold milk and ice enter the glass, then confirming that enough space remains to stir everything together without spilling. This article walks through one clearly bounded example using a 500ml glass, 15g cocoa powder, 10g sugar, 40ml of suitable warm water, 200ml of pasteurized milk, and 100g of ice. Adjust quantities to suit your own glass size, keeping the same sequence.
Read the note ↓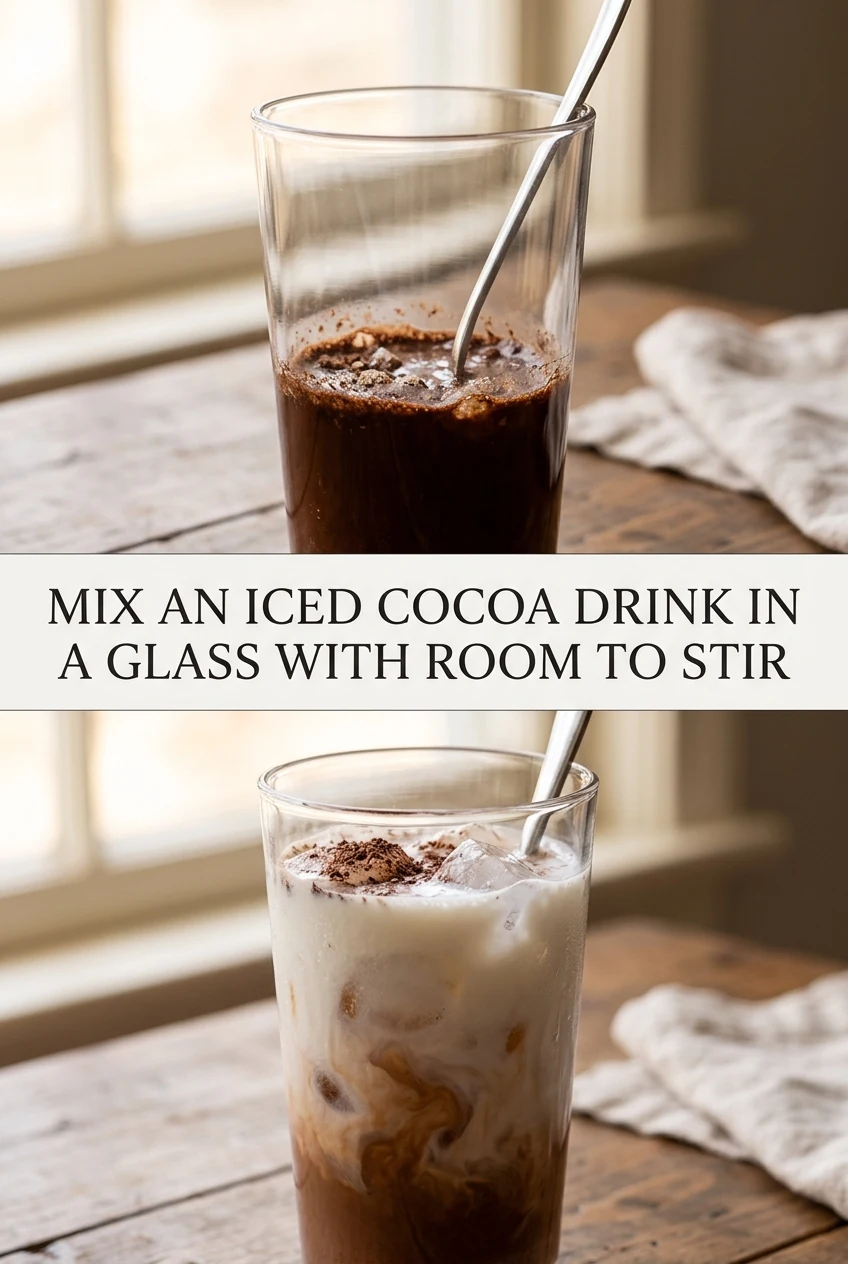
AI-generated editorial concept created for this article. The image is not a technical diagram or a tested result.
Choose a Glass with Genuine Stirring Room
Before measuring a single ingredient, hold your empty glass and estimate how full it will be once everything is added. In this example the combined volume of slurry, milk, and ice will occupy most of a 500ml glass, leaving only a short gap at the rim. That gap is your stirring clearance. If the gap looks too narrow for a long spoon to move freely without liquid sloshing over the edge, either use a taller glass or reduce the ice quantity before you begin. Making this judgment at the planning stage costs nothing; discovering the problem after pouring cold milk onto undissolved cocoa powder costs time and a messy counter.
Make the Cocoa Slurry First
Combine 15g of cocoa powder and 10g of sugar in a small bowl or directly in the bottom of your serving glass if it is wide enough to work in comfortably. Add 40ml of warm water, not boiling, just warm enough to help the powder hydrate. Stir with a small spoon using a pressing and circular motion until no dry clumps remain and the mixture looks uniformly dark and slightly glossy. This slurry step is essential because cocoa powder resists dissolving in cold liquid. Skipping it or rushing it will leave gritty pockets that no amount of later stirring will fully break up once cold milk is present.
Add the Milk Before the Ice
Pour 200ml of pasteurized milk into the glass over the finished slurry. Stir immediately and thoroughly, scraping the bottom and sides of the glass to lift any residue that settled there. The drink should look evenly brown with no streaks before you move on. Adding milk before ice gives you a less crowded glass at this stage, making stirring easier and more effective. Once the milk and slurry are fully combined, taste a small spoonful and decide whether the sweetness and cocoa intensity suit you. This is the last practical moment to adjust either ingredient without disrupting ice.
Add Ice and Check Your Stirring Room
Add the 100g of ice gradually rather than all at once. After the first portion goes in, look at the liquid level relative to the rim. If the glass still has a comfortable gap, add the remaining ice. If the level is already close to the rim, stop adding ice and set the remainder aside. Stirring a glass that is too full will cause spills regardless of how carefully you move the spoon. Once you have added as much ice as the glass safely allows, give the drink a final stir to ensure the cocoa mixture that may have settled during the ice-adding process is redistributed evenly throughout the glass.
Storage and Perishable Safety
An iced cocoa drink made with pasteurized milk is a perishable item. If you prepare it and do not drink it immediately, refrigerate it at or below 40°F (4°C) within two hours of preparation, or within one hour if the surrounding air temperature is above 90°F (32°C). Do not leave it sitting on a counter or table beyond those windows. If ice melts and the drink warms up during that period, the two-hour or one-hour limit still applies from the moment the drink was first made, not from when the ice finished melting. When in doubt, discard the drink rather than risk consuming a dairy product that has been left at an unsafe temperature.
A little more
to know.
Can I use cold water instead of warm water to make the slurry?
Warm water helps cocoa powder hydrate and disperse more readily than cold water does. Cold water can be used, but you will likely need to stir the slurry for a longer time and with more effort to reach the same smooth result. If you only have cold water available, allow extra time at the slurry stage and inspect it carefully for remaining dry clumps before adding milk.
What if my glass is smaller than 500ml?
Scale the ingredients down proportionally and apply the same sequence: slurry first, then milk, then ice added gradually while checking the remaining space. The most important habit to carry over is checking stirring room before committing to the full ice quantity. A smaller glass fills up faster, so that check becomes even more important to avoid spills.
Original editorial guidance and recipe formulations, not independently kitchen-tested. Times are estimates and depend on equipment and product directions. Cooked bases need additional cooling and refrigeration before cold serving. Images are AI-generated illustrations; appearance and yield may vary. Check actual ingredient labels, allergens, and any certification you require. We do not certify products. Read our approach.
Save to Pinterest ↗ANOTHER IDEA FOR THE COUNTER