Keep a Power Cable Clear of a Kettle's Serving Route
A cordless electric kettle sits on a powered base, and the moment you lift it to pour, the base cord becomes a fixed obstacle on your counter. Planning where that cord lands before you brew is a small act of organisation that keeps your serving path open and reduces the chance of a snag mid-pour. This article walks through one illustrative home-cafe layout plan — not a tested or certified result — showing how to think through cord placement, counter space, and cup positioning so that the cable never crosses the line between kettle and cup.
Read the note ↓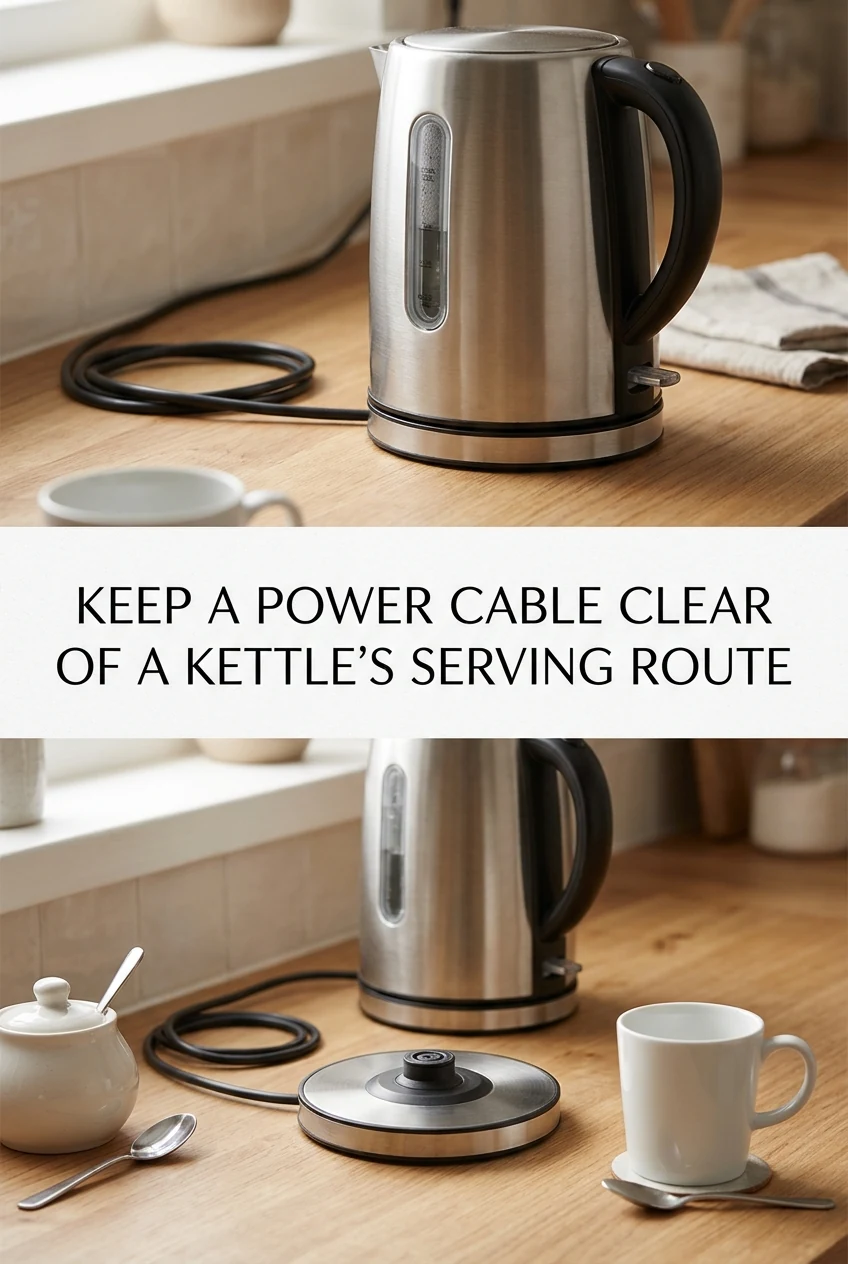
AI-generated editorial concept created for this article. The image is not a technical diagram or a tested result.
Understand How Your Kettle's Cord Is Designed to Sit
Most cordless kettles use a 360-degree swivel base, meaning the cord exits from a fixed point on the base unit but the kettle itself can be lifted and replaced from any angle. Before arranging anything, consult your kettle's manual for the manufacturer's recommended placement instructions, including minimum clearance distances from walls and other appliances. Note which side of the base the cord exits from — this is the side that must face away from your pouring direction. Do not modify the cord, plug, or base in any way. The goal is to position the base so its cord exits toward a wall or backsplash, keeping the front and sides of the unit completely free for lifting and pouring.
Map Your Counter Before You Place Anything
Stand at your counter and decide where your cup or server will sit during pouring. This is your destination point. Draw an imaginary straight line from that spot back to where the kettle base will stand — this is your serving route. The cord must not cross this line at any point, either along the counter surface or hanging over the edge. Measure the usable counter length available. A common home setup might offer 60 centimetres of clear counter. If your kettle base is 18 centimetres wide and your cup sits 25 centimetres away, you have roughly 17 centimetres of buffer, which is enough to keep the cord tucked behind the base without it looping forward. Sketch this out on paper as an illustrative plan before committing to a layout.
Position the Base With the Cord Facing the Wall
Place the kettle base so the cord exits toward the nearest wall or backsplash. Route the cord along the wall to the nearest outlet, keeping it flat against the surface rather than looping across open counter. If the cord is longer than needed, use the base's integrated cord-wrap channel if your model includes one, or loosely loop any excess along the wall without sharp bends or pinching. Never force unmanaged cord underneath the base where it could make the unit unstable, and never run the cord beneath the kettle itself. Check that the plug sits fully in the outlet and that no part of the cord drapes over the counter edge where it could be caught by a passing hand or pulled by the weight of the kettle. This is a layout decision, not an electrical modification.
A Worked Example: One Illustrative Counter Plan
Imagine a counter that runs 90 centimetres along a wall with a single outlet at the far right end. The kettle base is placed 15 centimetres from the right wall, cord exiting to the right and running directly to the outlet — a cord run of roughly 15 centimetres with no slack needed. The kettle sits on the base at centre-right of the counter. The cup or pour-over server is placed 30 centimetres to the left of the base, well within comfortable pouring reach. The serving route — the path the kettle travels from base to cup — runs left across open counter with no cord in its way. The left side of the counter remains free for a small tray holding a halal-certified tea blend, an alcohol-free vanilla syrup, and a clean spoon. This plan is illustrative only and should be adapted to your specific counter, kettle model, and outlet position.
Check the Route Each Time You Brew
Counter arrangements shift. A bag of groceries, a second appliance, or a moved cup can quietly push something into your serving route between brewing sessions. Make it a habit to glance at the cord path and the space between the kettle base and your cup before you switch the kettle on. Confirm the cord is still directed away from the pouring line, that nothing has been placed across the route, and that the plug is fully seated. If you are preparing a drink that includes perishable ingredients — such as fresh milk or a homemade syrup stored in the refrigerator — have those items ready and return any unused portion to the refrigerator promptly after use. A clear cord route and an organised counter work together to make each brew session calm and unhurried.
A little more
to know.
Can I use a cable clip or adhesive hook to hold the cord against the wall?
You can use a removable adhesive hook or clip rated for light cord management, provided it does not pierce, pinch, or alter the cord's outer sleeve in any way. Check that the product is designed for household cord routing and follow its own installation instructions. Never staple, nail, or tape directly over the cord itself, and do not use any fastener that compresses the cord. When in doubt, simply routing the cord flat along the wall without any fastener is a straightforward, low-intervention approach.
What if my outlet is on the same side as my cup, making the cord cross the serving route?
If your outlet position means the cord naturally runs toward your pouring destination, reposition the kettle base to the opposite side of the outlet so the cord travels away from the cup rather than toward it. If the counter layout does not allow this, consider whether a different counter location with a more suitable outlet position would work better for your setup. Do not use an extension cord unless it is rated for the kettle's power requirements and approved for kitchen use according to the manufacturer's guidance — and even then, route it with the same care to keep it away from the serving path.
Original editorial guidance and recipe formulations, not independently kitchen-tested. Times are estimates and depend on equipment and product directions. Cooked bases need additional cooling and refrigeration before cold serving. Images are AI-generated illustrations; appearance and yield may vary. Check actual ingredient labels, allergens, and any certification you require. We do not certify products. Read our approach.
Save to Pinterest ↗ANOTHER IDEA FOR THE COUNTER