Iced Espresso and Oat Milk With a Cocoa Float
A dark cocoa layer resting on top of an iced espresso drink looks striking, but unsweetened cocoa powder dropped directly onto a cold liquid tends to clump on the surface or sink in streaks before you can photograph it. The fix is straightforward: dissolve the cocoa in a small amount of warm water first, let that mixture cool, then pour it carefully over the finished drink. This article walks through the build order and the reasoning behind each step so you can put together a visually layered glass at home.
Read the note ↓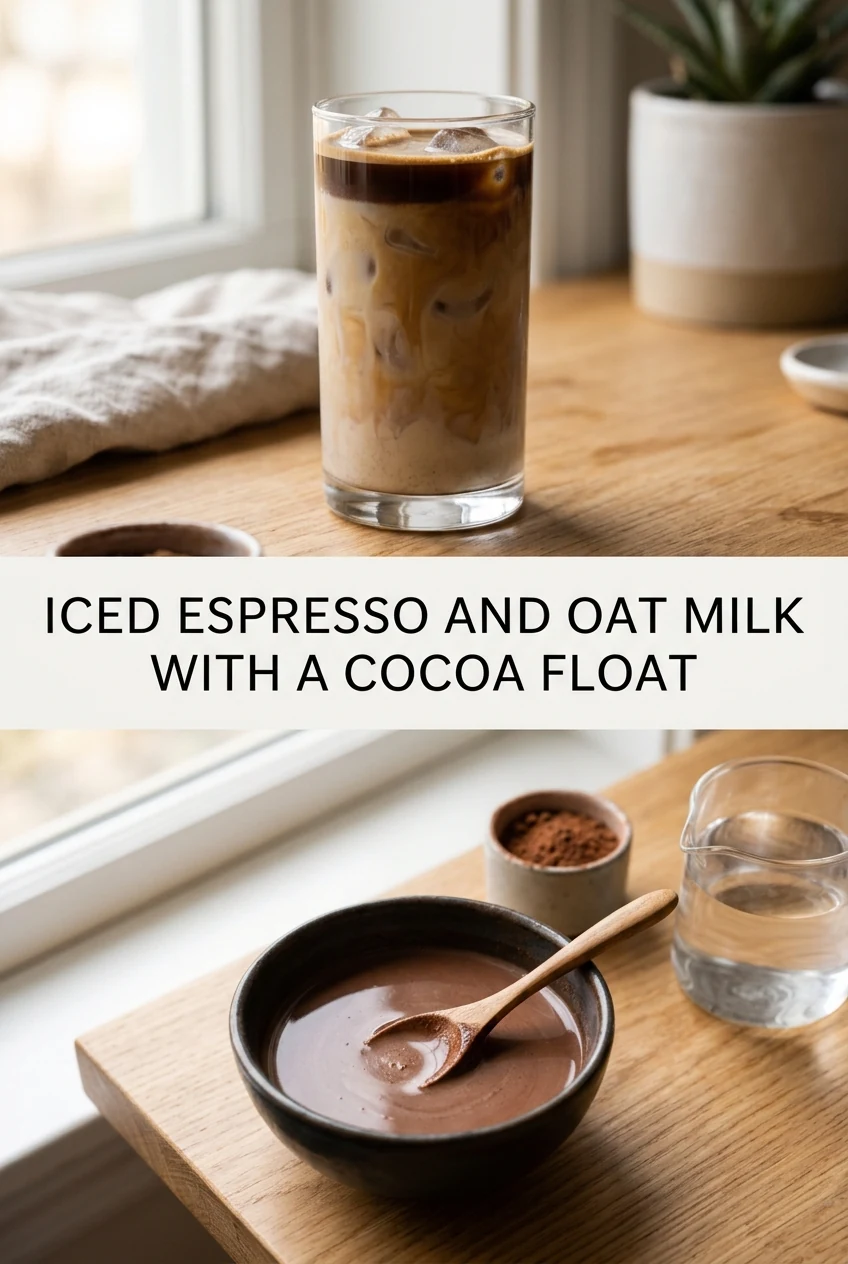
AI-generated editorial concept created for this article. The image is not a technical diagram or a tested result.
Why Cocoa Sinks or Clumps
Unsweetened cocoa powder is hydrophobic when dry, meaning it resists absorbing cold liquid quickly. When you spoon dry cocoa onto a cold drink, pockets of powder stay dry inside while the outside gets wet, forming clumps that either float unevenly or pull apart and fall through the drink. Even finely milled cocoa behaves this way in cold conditions because the fat particles in the powder need some warmth to disperse properly into water. Dissolving cocoa in warm water first breaks up those fat pockets and creates a smooth, pourable liquid that behaves more predictably when it meets the cold layers below.
Preparing the Cocoa Mixture
Measure one teaspoon of unsweetened cocoa powder and one tablespoon of warm water into a small cup or ramekin. Stir steadily for about thirty seconds until no dry streaks remain and the mixture looks uniformly dark and slightly glossy. You can add a small pinch of sugar at this stage if you prefer a lightly sweetened float. Set the cup aside and allow it to cool to room temperature, or place it in the refrigerator for a few minutes. The mixture should feel cool or at most barely warm before you use it; adding a warm liquid to a cold drink too quickly can disturb the layers you are about to build.
Building the Drink in the Right Order
Fill a tall glass with ice cubes, using enough to fill roughly two-thirds of the glass. Pour cold oat milk over the ice first, leaving roughly two inches of headspace below the rim so there is room for the espresso and cocoa layers. In this illustrative plan, a 350-millilitre glass filled two-thirds with ice leaves space for roughly 180 millilitres of total liquid, accommodating both the oat milk and the espresso. Pull one or two shots of espresso using your machine according to its instructions, then let the espresso cool for two to three minutes so it is no longer steaming hot. Pour the cooled espresso slowly over the back of a spoon held just above the oat milk surface. This slows the pour and helps the espresso settle as a distinct layer rather than mixing immediately. You will now have ice at the bottom, oat milk in the middle, and a darker espresso band near the top.
Floating the Cocoa Layer
Take your cooled cocoa mixture and hold a clean spoon, curved side up, just above the espresso layer. Pour the cocoa mixture very slowly over the back of the spoon so it spreads gently across the surface rather than falling in a concentrated stream. Dispersing the liquid across the back of the spoon reduces downward momentum, allowing the cocoa mixture to spread across the espresso surface rather than plunging into the milk beneath. The result is an illustrative layered appearance: pale oat milk below, espresso in the middle, and a deep cocoa float on top. Results will vary depending on the specific oat milk brand, espresso concentration, and how steadily you pour, so treat this as a guide rather than a guaranteed outcome.
Adjustments and Variations
If the cocoa layer still sinks more than you would like, try increasing the cocoa-to-water ratio slightly, using one and a half teaspoons of cocoa to the same tablespoon of water, which produces a thicker mixture that moves more slowly through the drink. Chilling the cocoa mixture fully in the refrigerator before floating it also helps, because eliminating temperature differences prevents convection currents from disturbing the interface. For a lightly sweet version, stir a small amount of simple syrup made from sugar and water into the cocoa mixture before cooling it. If you enjoy a hint of warmth in the flavour, a small pinch of ground cinnamon stirred into the cocoa mixture works well. Use any flavoring additions that are explicitly alcohol-free.
A little more
to know.
Can I use Dutch-process cocoa instead of natural cocoa?
Yes. Dutch-process cocoa dissolves into warm water in much the same way as natural cocoa and produces a slightly smoother, less acidic flavour. The build process and ratios described here apply to either type. Choose whichever you prefer for taste.
Will the layers stay separate if I let the drink sit for a while?
The layers will gradually mix on their own as the ice melts and the liquids shift. This drink is designed to be enjoyed soon after building it, while the visual separation is still visible. Stirring before drinking combines all three layers into a single flavour.
Original editorial guidance and recipe formulations, not independently kitchen-tested. Times are estimates and depend on equipment and product directions. Cooked bases need additional cooling and refrigeration before cold serving. Images are AI-generated illustrations; appearance and yield may vary. Check actual ingredient labels, allergens, and any certification you require. We do not certify products. Read our approach.
Save to Pinterest ↗ANOTHER IDEA FOR THE COUNTER