Arrange a Small Tray for Iced Tea Straining So the Sieve Stays Steady Over the Jug
A sieve that rocks or slides during pouring deposits leaf sediment directly into the finished jug and wastes concentrate that took time to steep. The problem is almost always a stability problem, not a sieve quality problem. Arranging the jug, sieve and a few small supports correctly on a tray before you begin pouring takes under a minute and eliminates most spills and sediment transfer during the straining step.
Read the note ↓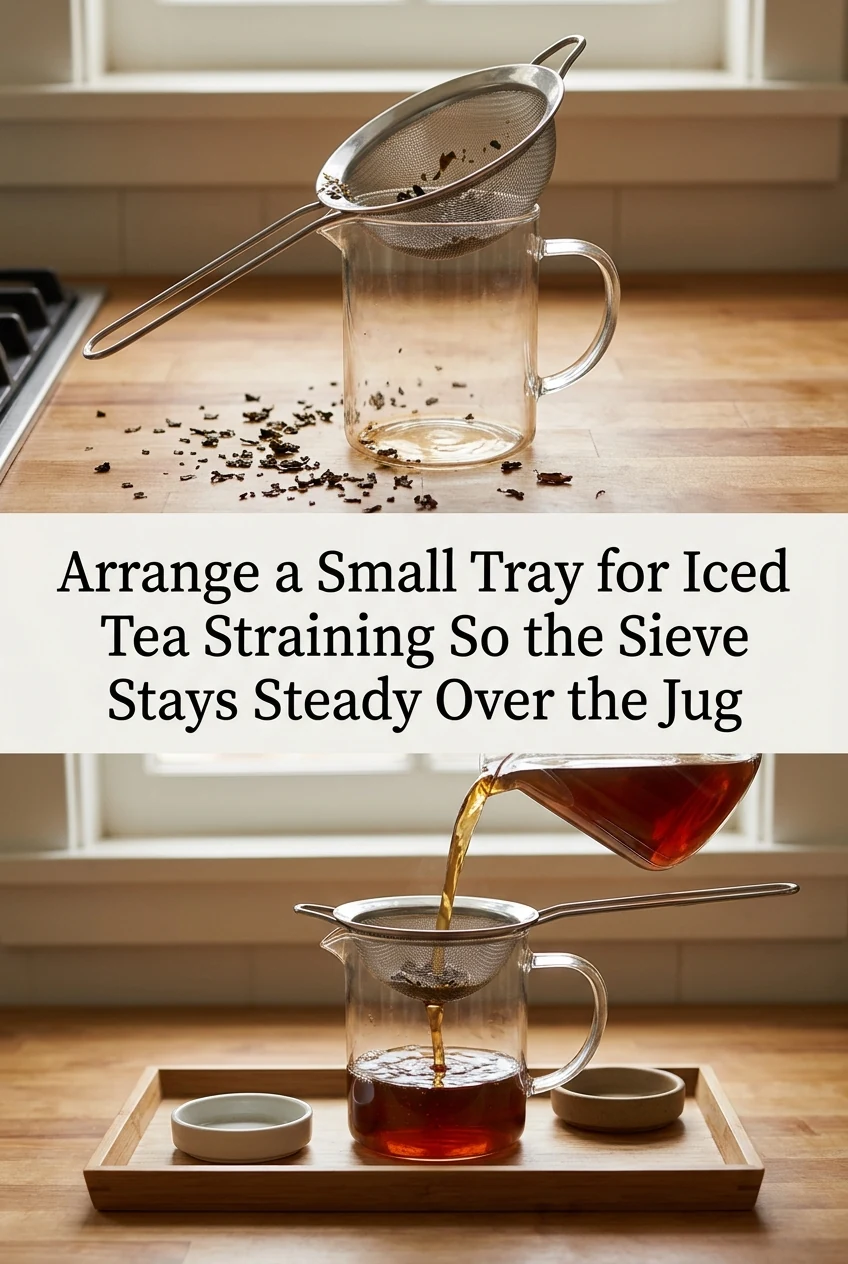
AI-generated editorial concept created for this article. The image is not a technical diagram or a tested result.
Choose the Right Tray Size First
The tray needs to hold the jug, the sieve resting across the jug mouth, and a folded damp cloth without crowding. A tray roughly 35 cm by 25 cm is workable for a standard one-litre jug. Smaller trays force the cloth off the edge, removing the friction anchor that keeps everything in place. A tray with a low raised rim is preferable to a flat board because any drips stay contained and the rim itself can brace the jug base.
Position the Jug Against a Fixed Point
Place the jug in one corner of the tray so two sides of the jug base are braced by the tray rim. This stops the jug from sliding backward when you press the sieve down during pouring. If your tray has no rim, fold a damp cloth into a thick rectangle and place it behind the jug as a wedge. The cloth absorbs vibration and grips the tray surface, keeping the jug stationary without any clamping.
Anchor the Sieve Over the Jug Mouth
A fine mesh sieve should rest with its rim sitting on the jug mouth rather than balanced on the handle alone. If the sieve rim is wider than the jug mouth, it will rest stably on the lip. If the sieve is narrower, loop a rubber band around one sieve handle and hook it over the jug handle to prevent lateral drift. Test the anchor before pouring by pressing gently on the sieve rim; it should not rock or tilt.
Control the Pour Rate to Reduce Pressure on the Sieve
Pouring the full steeping vessel in one fast motion pushes liquid against the sieve mesh faster than it can drain, building up weight that shifts the sieve sideways. Pour in a slow, steady stream, pausing briefly if liquid pools above the mesh. A steeping vessel with a handle and a pouring lip gives better control than a lidded pot poured from the side. This single adjustment reduces sieve movement more than any tray arrangement change.
Clear the Tray and Refrigerate Promptly
Once straining is complete, remove the sieve immediately so residual drips do not fall back into the jug. Cover the jug with its lid or cling film and move it to the refrigerator within two hours of brewing, or within one hour if the kitchen is above 32 C. Rinse the sieve under cool running water straight away; dried leaf particles are harder to remove and can block fine mesh over time. Do not leave strained tea at room temperature to cool slowly.
A little more
to know.
What if my sieve handle is too short to reach across the jug mouth?
Rest the sieve bowl inside the jug mouth so the mesh sits just above the liquid level, then pour slowly. The jug walls support the sieve body directly. Remove it by lifting straight up once draining slows to prevent the mesh from dragging across the jug rim.
Should I strain into the serving jug directly or into an intermediate container?
Straining directly into the serving jug saves a transfer step and reduces sediment disturbance. Use an intermediate container only if the serving jug has a narrow neck that makes sieve placement unstable, then transfer the clear liquid carefully afterward.
Original editorial guidance and recipe formulations, not independently kitchen-tested. Times are estimates and depend on equipment and product directions. Cooked bases need additional cooling and refrigeration before cold serving. Images are AI-generated illustrations; appearance and yield may vary. Check actual ingredient labels, allergens, and any certification you require. We do not certify products. Read our approach.
Save to Pinterest ↗ANOTHER IDEA FOR THE COUNTER